 When working with ‘outdoor’ fabrics, it’s really useful to remember a couple of things:
Unless you know otherwise, the fibers are man-made and will MELT at temperatures used to iron. Period.
This is actually huge for home sewers because we are taught, from the moment we pick up a pin, that pressing is everything and with some fabrics, the more steam the better. With man-made fabrics, you literally can end up with a trainwreck on your ironing board if you that. So, for purposes of this project, we need to remember that because the fabric I’m using for the outside and facings of this raincoat are nylon with a DWR (Durable Water Resistant) coating.
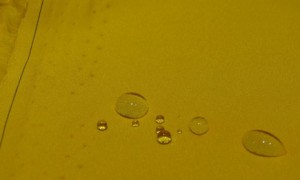
Second item: Please refer to the photograph at the top. Some outdoor fabrics, due to their construction, are going to come with an inside that is a totally different color than the outside. I have, in the vast (and strangely enough, growing) collection of fabrics at Chez Siberia, a red nylon with DWR which is grey on the inside. So, knowing which is the inside and which is the outside is pretty easy. However, if you check the photo at the top, you see that the inside and the outside are the same exact color. How can you tell when you are cutting it out which is which. Please see two items — on the left hand side, in the selvedge, there is a minute black stripe on one side – that indicates ‘outside’ on this fabric. Additionally, another trick, which is demonstrated with the water beads, is to take a spray bottle and spray on both sides to see which side ‘beads up’ – that’s the DWR side. Now no one in their right minds wants to keep spraying the pieces of cut out fabric to see which side is the ‘right side’ while they are sewing, so what I do is to make a teeny ‘x’ in what would be the seam allowance on the inside of every piece so that I have an easy way to do a quick check while I’m sewing to make sure I put the DWR on the outside.
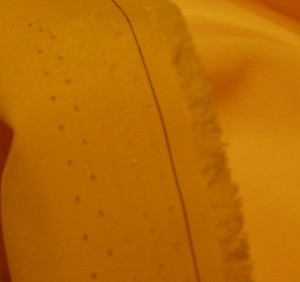 Third. Now, this is not the best picture in terms of focus but I think you can see the rows of teeny holes at the selvedge edge. This is caused by the ‘tenter hooks’ on the looms where these fabrics are woven. Now, we have discussed the issue of holes in fabrics such as these before – you don’t want any more holes than you can possibly avoid, so when you cut out the patterns, make sure that you are away from these holes. I avoid them even in seam allowances.
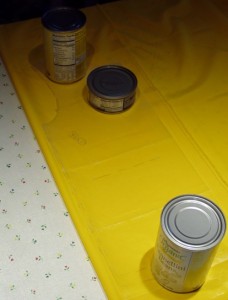 Fourth. And speaking of holes, if you want to avoid holes, you can either pin in the seam allowances (which I just told you to avoid) or you can use pattern weights or, in Aunt Toby’s case, use canned goods. Using cans can get a bit awkward when you want to do the cutting out part, so I take a wash out marker and draw the cutting out lines of the pattern on the fabric and use that.
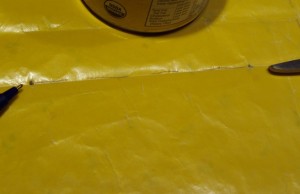 Fifth. If you can’t use pins and want to avoid as many holes as possible, how do you do any specific markings? As demonstrated in the photo, I take the pattern, cut out teeny holes when I need a mark, put the pattern on the insides of the pieces and transfer the marks to the inside using a marking pen. In this case, it’s marking where the top of the pocket goes. Ordinarily, I’d use pins but…. not here. As it is, once I finish putting the pockets on the front of the raincoat, I’m going to use waterproof seam sealer tape and my Teflon(tm) ironing sheet to waterproof all the stitching on the back side of the nylon fabric.
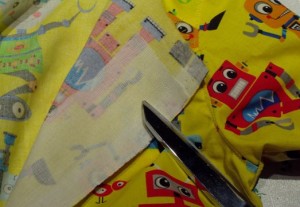 Sixth. Stabilizing. Now, as I’ve said numerous times (and you will get positively nauseated by the time this is over by the number of times I will have said, “this fabric melts”), I can’t iron the outside of this raincoat. And just to protect the inside (which, even if I was not going to put in a zip-out liner, I’d want to do), I’m putting in a lining. In this case, since this is for my grandson, I found some fun cotton in a robot print (he dotes on robots) for the lining. Linings perform many functions and in this case, the part which ordinarily would not be there (because I am putting in a facing) is going to function as part of the stabilizing. The front edge of the raincoat, where there will be a zipper, needs to be stabilized – there is no doubt about that. But I can’t use fusible interfacing and just having a hunk of non-fusible just sewn in at the edge doesn’t do anything for my sense of completeness. So – I have ironed on fusible interfacing (from the greatest interfacing designer/producer on the planet, Pam Erny) at the front edges of the lining to reinforce the support and I will be sewing the facing and the edge of the lining together with the front of the raincoat. Once I get the zipper unit for the zip-out lining put into the facing, no one will be able to tell that the lining extends to the front except for me and the zipper, which will not rip out.
