
 I know there are people who are going to argue with me on this, but if you have a limited budget in terms of improving the energy efficiency in your living unit, your Aunt Toby is going to advise using it to buy caulk. And a caulking gun if you can’t borrow one from someone.
Why not insulation? I just checked the price on that – one roll of R19, 15” wide, is $15.67.
We just did a little project as a final little ‘zip up’ for winter, and it hit me when I went to the ‘large chain building supply place because we don’t have a local hardware any more’ how cheap caulk was in terms of what we were getting versus how much insulation was going to cost if someone were going to try to insulate an attic, for example. I bought a 4-pack of silicone caulk for about $15.00 (a caulking gun was another couple of bucks but we already own those). Now, in the hands of a real pro with non-shaky hands, one tube of caulk will theoretically cover 3-4 standard (not huge floor to ceiling) sized windows. As part of our ‘just a little work in the kitchen and bathrooms that turned into gutting the entire house, putting in beams in the basement and the first floor and basically rebuilding the house while we lived in it nightmare”, we replaced 90% of the windows in the house as part of the energy saving investment. As part of that, they were all caulked on the inside and we recently went around and made sure that they were all caulked up the gazoo on the outside too. We were able to complete 15 windows with that $15 worth of caulk. We knew the doors and upstairs windows had been done, so from that aspect, we are buttoned up.
 The trick to energy efficiency and plain old ordinary comfort is keeping the warm air inside and the cold air outside.
Did you know that the word ‘window’ comes from the Middle English word, ‘windeye’ meaning an opening that allowed the wind to come into a dwelling?
No kidding.
One of the first things we did when we moved to Chez Siberia was that we insulated the attic. Hugely. And in the winter, the house always felt drafty, chilly and nasty. We will not discuss the fact that there were times when people could see their breath in the kitchen and would eat meals at an Indianapolis Speedway clip so that they could jump up and run off to the livingroom where a) the sun would come in the south side of the house and b) the thermostat was located so that was always the warmest room in the house. Even with that insulation, we were damn cold.
It was the windows. We tried rope caulk. We tried putting plastic over them. It was amazing how like a ship in full sail that plastic used to look shrunk across the window, bowed out into the livingroom, reminding us just how much bone-chilling air was coming into the house. Living conditions were bleak, to say the least. No one wanted to come visit US during the winter. Sitting at a computer or watching the tube in a room like that is as close to self-induced paralysis as I can think of. First the feet start to lose feeling and it moves up from there. Uncomfortable does NOT even begin to describe it. The fights over the setting on the thermostat were amazing. A lot of energy got used. A lot of energy got wasted.
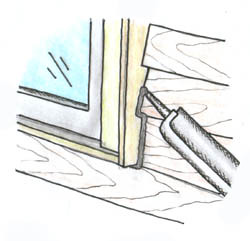
The attic insulation was basically being overwhelmed by the amount of air exchange that was taking place because of the leaks within the windows and around the windows. That’s why I say that your best ‘first dollar’ investment in terms of energy efficiency (if you don’t have enough money to replace the windows themselves) is on caulk to seal up all the leaks. If, once you’ve caulked around the 90-degree angle where the frame meets the wall inside and outside the windows, you still have infiltration (use the candle or blown out match trick to watch the direction of the smoke), THEN use plastic on the inside of the windows (you can use any form you want – the plastic window kits from the hardware store, rolls of plastic and double faced tape – your choice). If you own your residence, start saving your money for replacement windows. Even if you can only do one at a time, every time you replace the old leaky window with a new window (and new caulk!), you will achieve more insulation quality and more comfort.
While you are at it, look for more opportunities to use caulk:
Around the edges of doors
Where the bottom of the walls of your house meet the foundation
Any place where there is a hole made in a wall such as a dryer vent, a kitchen fan, etc.
Here’s a great little .pdf from Dow with a check list. It’s made for their foam based product but these are good locations for caulk as well. caulk checklist
One thing to remember at this point in the year – if you live with daytime temperatures in the 50s NOW, get this done NOW. Caulk does not adhere well or settle in temperatures lower than about 50. Go to whatever store carries silicone caulk, get it and then the next nice sunny day where the temperature gets into the 50s, “get ‘er done”. If you wait too long, it will be too late.
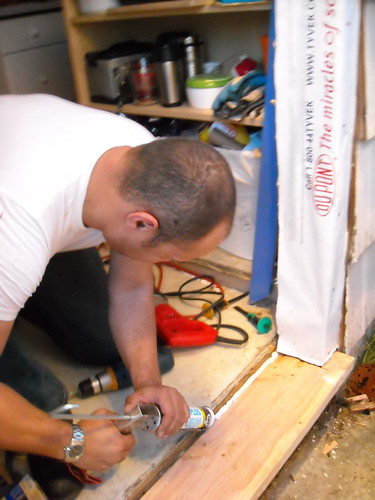
We made this a family project and got out two caulk guns and went at it so that everything got done while it was nice and sunny. A couple of hours work was all it took and was a great load off everyone’s mind.
The other thing to think about is if you do NOT own your residence – you rent. It is not as if you can replace the windows or put insulation in the walls. But with clear silicone caulk, you can seal around the windows on the inside of the living space. The landlord won’t know and it will add a lot of comfort in the winter.
And it’s cheap. It’s your best first investment when you don’t have the capital to do major insulation and window replacement to improve energy efficiency. And with the drafts cut down, the comfort level will go up and there is less incentive to raise the setting on the thermostat.
Works for me.
(photos courtesy of girly sin and neutral existence)
