 And..back to cold floors and a cold house and what to do about that. But first, as is my wont, a little story.
A couple of years ago, we had a huge flood in our area. Chez Siberia, being on a hill and not near the rivers involved, was not hit, but many people were and a big coordinated effort was put together to send teams of the able-bodied to homes that frankly were under water and needed wrecking out. The DH and I volunteered to be part of one of those teams. This poor little house was old, with a laid-up stone basement (the worst sort; I have grave misgivings about any house with a laid-up stone basement, mostly involving water and snakes but that is another story for another time). The flood had filled the basement and the first floor to almost the ceiling. We won’t discuss the logic of doing anything with this home other than bring in the bulldozers and roll-off trailers. The DH and I were part of the team that went into the basement, which at this point was like something out of “Alien” if you recall the early scene in the hold of the ship with the eggs — foggy, dark, drippy and dank. To say it gave me the creeps is to put it mildly.
All over the floor, in the six inches of muck, were hunks, chunks and long pieces of fiberglass insulation. There was also wet, moldy insulation hanging from the ceiling joists. There was also a part of the house that had been built over a dirt crawl space, which had been turned into a swampy combination of mud and insulation. Handling that stuff was a lesson in the shivers, I can tell you and there was a whole part of the under-story of that house that we did not touch because the crews upstairs started their work with saws and crowbars, which caused all sorts of stuff to start raining down on our heads. We bolted for the stairs and told the crew chief that they’d have to either cease work upstairs and send everyone down to the basement, or just work upstairs and do the basement later. After looking at the basement, the crew chief decided to send in a request for professionals to come down since it was probably going to require some engineering.
But (and back from the digression), for me, it was lesson learned: fiberglass insulation should only be used in areas where it is dry, expected to always BE dry, and not subject to ever getting wet. Ditto for cellulose insulation, which had been blown into the walls of the first floor and which had acted like a wick, pulling floodwaters right up the walls into the ceiling.
But, back to our own little corner of Hell in our basement. This area, which frankly, no matter how much drainage we have done, is for geographic and probably other reasons outside that corner of the house, is always damp, and tends to leak up through the floor when it rains. So, there was no way we were going to use fiberglass bats in the ceiling joists of that area to try to keep the cold from penetrating the floors.
Enter: Styrofoam insulation.
OK, this would not be my first choice, either, and I’m not going to get into the whole ‘I’d rather not give my money to companies such as xxxx’ discussion. This is a lesson in how to get this done. Styrofoam insulation, to be blunt, is faster, more efficient, and quicker than anything else we’ve ever done. I did not want to bring in the spray foam folks – that stuff is amazingly effective in terms of sealing up and if it were the summer and we were going away for several weeks, I’d think about it. But it’s winter, and I host extremely small children in this house. Not the time for something like urea foam.
Here’s how you go about this. You’ll need:
Steel tape measure
Small knife, with or without a serrated edge
Chalk snap line or some other way to making a line to follow for cutting
Mallot (optional but really useful)
Piece of wood – chunk of plywood or masonite(tm) works well
Step One: Check under the floor joists for nails sticking out. There may be ones not only pointing down from the subfloor upstairs, but also sticking out of the joists themselves for various reasons. Either pull them or figure out how you will slide the piece of foam over them because you need to get the foam right up next to the subfloor.
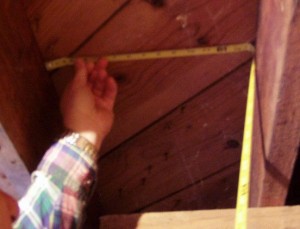
Step Two: (see photo at the top) Measure between the floor joists just under the subfloor. Believe it or not, that measurement might not be the same as between the floor joists at the bottom of the joists.
Step Three: Mark the styrofoam insulation.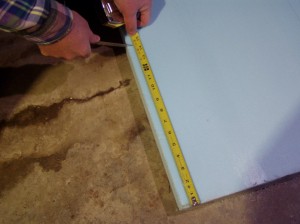 Using your knife and the measurement from just under the subfloor, mark both ends of the piece of insulation. The DH is kneeling on the basement floor. Make sure you do NOT put your knee into the insulation.
Step Four: Snap a line through both those marks. This is your guideline.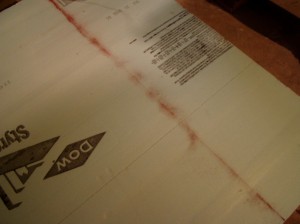 OK, so maybe you don’t have a chalk snap line. You can use a meter or yard stick and a pencil; just be careful, again, not to step, lean, or put your knee into the insulation.
Step Five: Cut the insulation.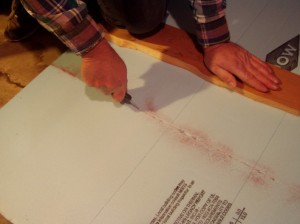 No one’s arm is that long and you’ll need to get to the center of the insulation. Put down the plywood or masonite(tm) and carefully lean down on that so that you can reach the center and cut along the guideline. Then go to the other end of the guideline and do the same. If it’s a little bit jagged, then use your knife to even it out.
Step Six: Install. 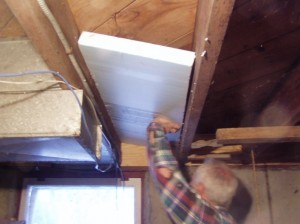 First, test the piece up against the space between the joists to make sure it’s going to actually go in. If it’s too big, the piece will snap into pieces if you force it. If you need to shave off a little bit from the long edges, take care of that now with your knife. Then, sliding it over your head, get the short end right up against the end of the space right next to the wall. Make sure that is snug and that, as in the photo, one long side of the piece of insulation is snugged up against the inside of one of the floor joists. Raise the other edge. If it jams, do NOT force it. Take it down and shave off a little bit more of the insulation and do this again. Don’t get too enthusiastic with that knife – you want the piece of insulation to fit against that other floor joist, but you also don’t want to end up shaving off too much. To finish off, using your mallet and piece of wood, put the wood up against the insulation and tap it, all along the surface, to make sure it is good and tight against the subfloor.
First piece done. Now, before you lose your nerve, do the rest!!


