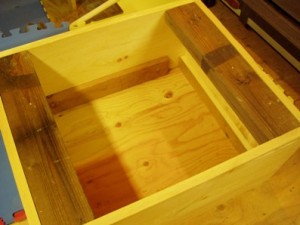
 After I saw how popular the chair refinishing posts were, I figured that y’all are hungering after more upholstery yumminess. This is basically the next step up – an ottoman.
Yes, I realize the photo at the top looks like an empty box, but bear with me on this because that box is actually the foundation not only of an ottoman, but of a lot of other basic furniture. We are not going to go into how to build a box today – that is for the future, but trust me on this one: If you can embrace the box, you’ve got a houseful of furniture just waiting for you.
For the next couple of posts, however, we are going to accept that the box already exists and move on from there to the upholstery. This box is a basic pine box that the DH made for me with scrap lumber, screws, and a couple of 2x4s (as you can see from the photo above). I asked him to put either 2x4s in the bottom or triangular blocks of wood in the corners because I want to put feet on this ottoman (I could put casters or those amazing industrial wheels on it too, but for this exercise, I’m just using wooden feet) and I need something structural to screw the feet into. If I didn’t want to put wood in there, I can also go to the hardware store and get items referred to as ‘corner plates’mounting plate.
As Aunt Toby ALWAYS says, “The end dictates the beginning,” and it applies in this case as well. There are certain decisions that we have to make right from the get-go with this ottoman. For example:
1) Legs or casters? Legs. Bun feet or legs? Legs? How tall? This is not a table, so I got relatively short, tapered wood legs from the hardware store. Stain the legs or paint? Stain.
2) In ottomans, the standard is to pad the box in some sort of way and sometimes, they are also ‘tufted’. That is, using buttons of some sort, the upholstery is pulled in on the side panels. Upholstered headboards on beds are sometimes upholstered in the same way. But to do this requires that holes be drilled into the surface. This is not something that you can decide to do after you’ve upholstered the ottoman – so you need to make the decision, find the center of each panel and drill the hole before you do anything else. Tufted or not? Tufted.
Bill of materials for this exercise:
Wooden box with either some sort of support in the open bottom for legs later. The size of my box is 24″ x 20″ x 12″ high.
Elmer’s glue
Staple gun
Scissors
Quilt batting (this is going to require more than anyone ever thinks. I’m using a full-size quilt bat.
Scissors
Straight edge of some sort
Pencil
Drill (powered or not) with a small drill bit in it
Needle threaded with thread to match the batting
So, the first item of business is finding the center of each panel on the sides and drill the holes. Here is how to do it:
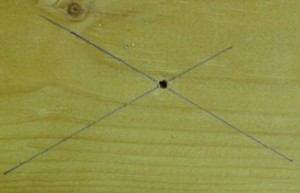 Using some long straight edge (in my case, I used a piece of scrap lumber because I can never find my yardstick when I want it), placed corner to corner, mark an ‘x’ at the center point on each of the four side panels and using your drill of choice (powered or not), drill a small hole. Don’t use a drill bit any larger than you really will need – the smallest bit in the set will probably work well.
The next bit is to pad the box. Now, I know other folks like to use products referred to as ‘spray adhesives’ but frankly, unless you are basically working outside, these have a toxic vapors problem (referred to as ‘VOCs’) that is really bad. Casein-based glues like Elmers(tm) work well.
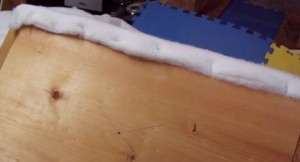 If you want, you can take something like paper grocery bags or news paper and make a pattern for the top but frankly, I didn’t bother; I draped the quilt batting over the top, leaving an inch all around and cut that to fit. Then, I took that piece and put that on the quilt batting and cut out a second piece. Quilt batting by itself, in one layer, is not thick enough and I don’t want any corners to poke through, so I’m using two layers all over this. So I have two pieces of quilt batting for the top. Then, I squeezed a thin bead, zigzagged over the wooden top and smeared it with my fingers all over the wood and carefully placed the two pieces on the top, evenly, and with the staple gun, secured it over the side edges.
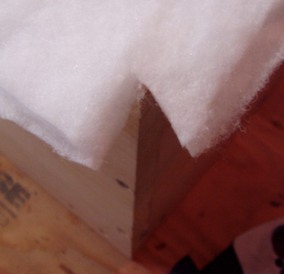 Now, what do you do with the corners? This is always an issue and frankly, the only way that I know of to make the corners neat is to cut a square out of them as indicated in the photo. If you make the corner small enough, you will have some of the batting to go over the corners, which will help in terms of wear and tear. So, as you go around the lid part, stapling the batting over the edge, cut the square and staple those down as well.
The next step is to pad the sides of the box. I could, I suppose, cut individual pieces for each side panel but I figure the fewer cut edges of batting I have to deal with, the better, so, first, I measured the side of the box all the way around. Then, I arranged the big piece of batting with the LONG side facing me, draped it over the side so I had a bit hanging over the open side of the box and marked the top of the batting on the top of the box (bear with me here). Then, I laid the batting down flat on the floor and folded the long side of the batting, using my mark for the top of the box as my fold line. Basically, I wanted to end up with a folded piece of batting (that is, a two layer piece) that would be long enough to go all the way around the box with a bit extra for leeway. Then, I cut the batting and folded it the long way.
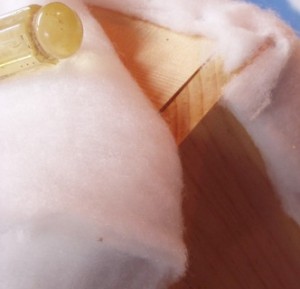 To start, just pick a side (that’s Side 1), and do the same thing with the glue that you did on the top. Taking the folded piece of batting so that a) the fold is at the top of the box (even with the top of the quilt batting on the top of the box at the edge) and b) the cut edge is an inch or so over the edge (see the photo above – see – I didn’t start the batting AT the edge – it’s going over the edge of what is really Side 4). Now, making sure that the fold still stays even with the top of the box, staple it at the bottom edge. The easiest thing to do is to march your way to the next corner (again, making sure the fold of the quilt batting is still matching the top of the box), and then carefully roll the box to the right so that Side 1 is now vertical and Side 2 is facing you. Squeeze more glue on the wood surface of Side 2, gently pull over the folded piece of batting, onto Side 2, and making sure that the fold matches the top of the box, staple the batting onto Side 2. Carefully roll Side 2 to the right so that Side 3 faces you and continue gluing and securing the folded quilt batting onto Side 3.
Roll side 3 to the right and now you are faced with Side 4. On the left hand side is the beginning of the quilt batting. Squeeze a bit of glue on and carefully matching up the fold on the quilt batting to the top of the batting on the top of the box, secure it about half-way across the side with staples at the bottom edge as you’ve done all the others. Why only half-way? Because we’ve got this issue where we started the quilt batting — we don’t want to just fold over the rest of the quilt batting over it – that would make a ridge. We also don’t want to just cut it short and but the ends up against one another because in time, what will happen is that the edges will shift and we’ll be left with a sunken in spot on the padding, which looks cheesy. What to do?
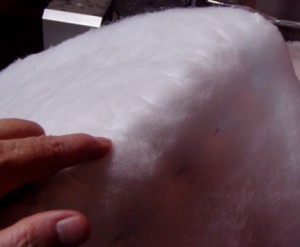 First, gently pull the quilt batting as close as you can get it to the cut edge of where we started the quilt batting and vertically, secure the last bit of batting there (you should have several inches extra so you’ll be ok, trust me) with staples. Opening the bit you have left, take your scissors, and trim the layer of quilt batting that is closest to the wood up to the fold, cutting right where you started the batting in the first place. Then, flipping the rest of the quilt batting over the corner, trim the upper layer of the quilt batting right where it hits on the corner. Then, taking your handy needle and threat (which is tough to see since I matched the batting with white thread) in your right hand, gently pull the batting over the corner toward Side 1 and secure the new batting over the starting edge. Pulling the batting with thin it out so that there is no bulge and securing them will prevent the edges from shifting.
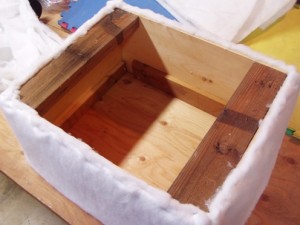 So, now you have batting on the top of the box and the sides. Carefully flip over the box onto its top and carefully secure the batting over the bottom edge. Do NOT pull the batting; you want to maintain that folded edge even with the batting on the top of the box. Then, taking your scissors, trim off any extra batting on the bottom.
At this point, we have a couple of decisions to make:
1) Do we upholster this with upholstery fabric or are we interested in being able to change the cover at a later date? If we want to be able to easily change the cover, then we need to upholster this in something like muslin or another thin, closely woven cloth. Then we can make a cover for it which can be secured with Velcro(tm) or a strap or something like that and which can be removed for washing or replacement. I’m going with strict upholstery treatment.
2) Are we interested in having a matching or coordinating pillow for the top? Now, mody ottomans (and this box was not built that way so this is a discussion for another time) are built with either a separate hinged, padded and upholstered lid, or a tray built into the open top which would have a piece of upholstered foam put into it. I’m being totally disagreeable with this and I’m going to make a separate foam pillow for this.
So, those are the two bits of business that we need to do in order to finish this ottoman and then put on the feet. Until the next time, then.
