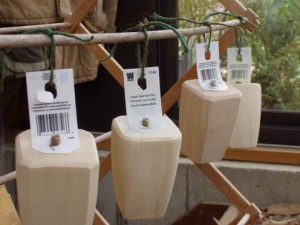
 When I bought the wood feet for the ottoman, they were hanging by plastic labels which had been stapled into the tops of the feet by the screw ends. My way of handling the finishing process of these was to haul out my trusty old (very very old) wood laundry rack and hang the feet by string through the hole in the labels. I could then swab the finish on them without their falling over, getting dirty and so on. I thought I was being very clever.
And actually, I was; this was the most successful finishing project I’ve ever done. Seriously. I was able to hold onto the plastic label, swab on the urethane/stain product with a small pad made out of a bit of one of the DH’s old undershirts (actually, this worked better than the foam brushes on the chairs – no drips, complete control of the product) and let the foot just drop and hang there. No danger of trying to set a wet item down and have it fall over. 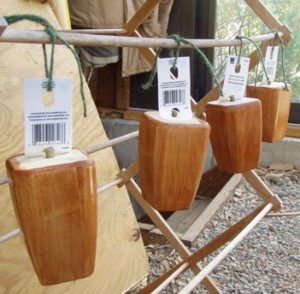 After they had dried for six hours, I sanded them with 220 grit sandpaper, wiped the dust off them and swabbed them again with the urethane/stain and allowed them to dry. Easy as pie. Sincerely. So, from that aspect, the feet were ready to go.
Except.
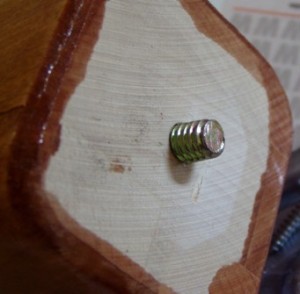 The DH took a look at them and pointed out something that I think is one of those genetic things that guys know from birth but that females don’t: There are two different types of screws — metal screws and wood screws. Metal screws have straight sides all the way to the end – wood screws taper to a point. The threads on metal screws are also finer than those of wood screws. There are other, more fine distinctions between metal screws and wood screws but suffice to say that I was not going to be able to just screw a hole into the 2x4s that he’d put in the bottom of the box making up the ottoman, screw in the foot and fire up “The Halleluiah Chorus”.
Nyet. Nada. Non.
So, I was back to a metal plate for the bottom that I WOULD be able to screw into the wood, with a receptacle that I could screw the metal screw on the foot into.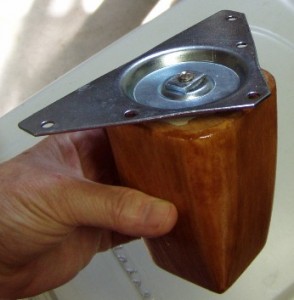 This photo shows how the whole shebang goes together – please note: The part that is showing at the top is the part that is going to have to go face down on the 2×4 so that the foot ends up pointing up. Always good to remember that.
How to install:
You will need the following:
Metal plates – they usually come with wood screws in the package. Mine are triangular in shape; I’ve seen other ones that are rectangular or square.
A screw driver with a head that matches the heads on the screws (this is usually a socalled “Phillips” head screwdriver with a criss-cross in it but check the package).
A pencil
A drill, powered or not OR a hammer and a large size nail
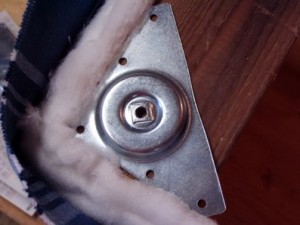 First, place the bracket at the corner of your piece so that as many of the holes in the plate are in the area of the wood. Using your pencil, mark through the holes in the plate. Do the same for corners 2, 3 and 4. As you can see from the photo, I have one hole that doesn’t have any wood underneath it – since I can attach screws to the other holes, I’m still good in terms of being able to have a stable foot under the ottoman. HOWEVER, please also notice the quilt batting — there is too much of it where that metal plate is, so I trimmed that right down so that when I used the drill, I didn’t have to worry about any of the batting interfering.
Second, you need to make what are called ‘pilot holes’ – these are just starter holes for the screws. It makes getting them started a LOT easier.
If you are using a drill, drill your holes – you don’t need to go all the way through. Again – please use all safely precautions – put both hands on the drill to guide it and so on. If you are using a hammer and a big nail, it’s pretty much the same story – just give the nail a couple of good hits to make a hole big enough so that when you put the screw in the hole, it can stand by itself.
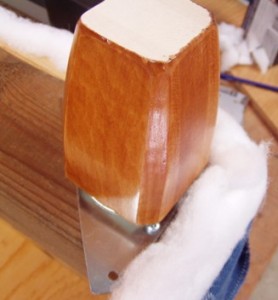 Third, align the plates with the pilot holes and with your screw driver, fasten them down. Don’t put the feet into the plates yet – we have to do the actual upholstery on the outside and it will go better if we don’t have to deal with the feet. At this point, the order will be upholster, tuft with the covered buttons, and THEN screw the feet into the metal plates.
Until the next time…

Aunt Toby, I love this series and your approach to it. Especially the tips like “A screw driver with a head that matches the heads on the screws (this is usually a socalled “Phillips” head screwdriver with a criss-cross in it but check the package).”
I can’t tell you how many anxious moments I had as a lad when my dad would say, from atop the ladder or under the floorboards, or wherever today’s project took him and His Trusty But Ditzy Helper, “Phillips screwdriver now….” and I would think — which one is that??? Your explanation is simply grand, throughout. Thank you!