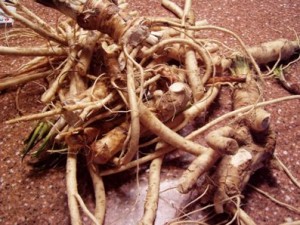
 As some readers might recall, Aunt Toby and a friend went to the Philadelphia Flower Show last spring. I bought some potatoes that did very nicely indeed and made a ‘what the heck’ purchase of some horseradish roots because our son (aka ‘The Boy’) is very fond of it and asked if we could grow it ourselves. Horseradish is very tough stuff because by the time I got around to planting it (which was about May, I think – and considering I’d bought it at the show in March, those poor little roots had been hanging around in their paperbag for almost two months) they were dried up little things and not very promising at all. We watered them in well when we planted them and made sure they had plenty of water and the plants came up in a very strong way. The leaves are about 2.5-3 feet tall, wavy and about 7″ wide.
Housekeeping:
Horseradish: Armoracia rusticana, is a member of the cabbage family, along with mustard and wasabi. It’s perennial to Zone 2 and is grown for it’s roots, which contain sinigrin, which, when the root is damaged, gets broken down in about 3 minutes to allyl isothiocyanate (mustard oil). This substance remains as long as the grated up roots are put into vinegar.
Cultivation: This plant has been cultivated for its roots for thousands of years, is mentioned in ancient writings, but for medicinal purposes (which I suspect center around ‘clearing out the sinuses’ more than anything else). It’s use as a condiment is very popular in eastern European and traditional Eastern European Jewish cooking, where it is referred to as ‘chrain’ and comes in two ‘flavors’: Red (which is a combination of beets, horseradish and vinegar) and White (plain horseradish and vinegar). Red is theoretically milder, but you can’t tell by me.
Horseradish How-to:
The easiest thing to do is to get a fresh root from the produce section or a local farmer, wash it up, cut it up into chunks, quickly wrap in plastic wrap and then double bag in a ziplock™ bag and put into the freezer. Then, take out a chunk and prepare horseradish sauce whenever you want it. This is not like pickles. I could not find a single recipe for how to can this. Since it is easy enough to make (other than the total sinus and tear duct cleaning out part), using the frozen pieces as you go seems like a good idea. Here is how:
 First – do this outside if you can. I did this out in our green house with two windows open and I still got hit in the sinuses, so at the very least, cross ventilation is a must. My father used to tell me that his grandmother used to make this by putting the grater and the bowl out on the fire escape, having him lower the window on top of her arms and stuff towels in the space around them while she grated.
Second – take your roots and wash them well, scrub with a veggie brush if necessary. At this point, they are still not pungent – I’m not sure why. Perhaps the sinigrin is not at the outer surface levels.
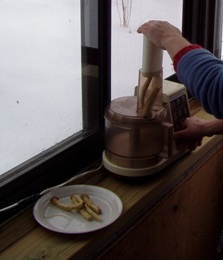
Grate the roots as finely as you can. I used a food processor and even that was not fine enough. Something that will really produce mush is what you want to use.
For every cup of grated up horseradish roots, add:
3 Tablespoons white vinegar
2 teaspoons of water
1.5 teaspoons of sugar or honey
I gave my son a taste of this and he coughed for a good five minutes, so I think I got the proportions right. Store in a closed container in the fridge and use as soon as you can on meats the same way you would mustard. Gifilte fish and other totally bland cooked fishes are a natural for this. Here’s a sauce to use on fish for baking:
2 Tablespoons of mayonnaise
1 teaspoon of prepared horseradish
Spread on fish just before you bake it. Done.
More on horseradish here:
http://en.wikipedia.org/wiki/Horseradish
Sources for horseradish roots: Many web-based garden seed and plant growers offer potatoes, garlic AND horseradish. The roots are easy to grow, but are pretty invasive so dig a little plot away from the rest of the garden and make sure there is plenty of room and compost in the hole. Plant the roots several feet down. Harvest the roots when the frost kills the leaves in the fall. Separate out the smallest roots and replant those at harvest time.

Hi
I did read that harvesting the roots after a frost improves the roots in the same way as it does parsnips.
I love a bit of horseradish sauce with roast beef and am most tempted to try out your recipe!
A question for you Aunt Toby…I went back to June and re-read your post about the peppers in the milk jugs in the garden…I am wondering how the experiment turned out?
Being in Manitoba, peppers are very finicky, and well, anything that can help them grow, I’m all for.
The peppers in the milk jugs worked very well — the ones in the soil in the garden, as suspected, did zip. The ones in the jugs produced very nice hot peppers (perhaps not as hot as we would have liked, but we did have a wet, chilly, cloudy summer). If I’d put them on the asphalt driveway, they would have done better still.
Thank for sharing that about the peppers. I was gifted an abundance of gallon ice cream pails-they number in the 50s-and thought of putting peppers in them…as well as fingerling carrots, and yellow bush beans…and anything else I can get into a gallon of dirt!