Kitchen Counter Economics Rotating Header Image

Cooking It

Beans again

cannelliniburgers1 I’m sure there are readers out there who feel that either our diet here at Chez Siberia is horrifically limited or that I’m on the payroll for the American Dried Bean Congress or some other PR group. ‘

Today’s post is not going to change your minds in that regard.

In our ever-growing efforts to eat more vegetarian/vegan meals, tonight, I made bean burgers and cole slaw – my attempt at a summery picnic meal (no, your Auntie’s knees do not allow her to kneel down on picnic blankets on the floor. I do draw the line someplace). Bean burgers are generally made with black beans – probably because when they cook, they are very dark and if you squint your eyes extremely small, you might fool yourself into thinking that they are rather well-cooked beef burgers. There is no way these burgers can be mistaken for beef or anything else, really because they start out light colored and end up…slightly toasted light colored burgers. We shall have to just throw in the towel, close our eyes (and no, not think of England..) and…chew gratefully.

Cannellini Bean Burgers
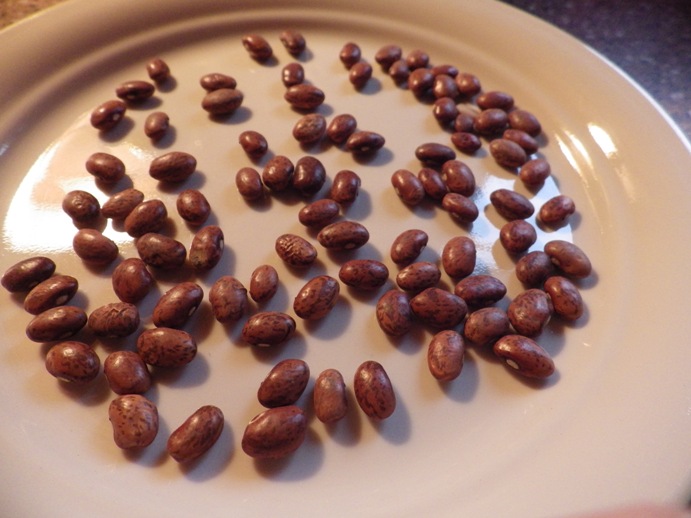
2 cans of cannellini beans, drained and rinsed really well, mashed rather thoroughly.
Veggies to mix in:
— one sweet pepper, chopped extremely fine
— 2 cloves of garlic, ditto
— Finely chopped mushrooms. If you are using canned, then one small can will do. If you are working with fresh mushrooms, then chop up 6 mushrooms that are about 1-1.5″ across the tops.
— 1/2 onion (about as large as a good-sized fist), chopped finely
Saute in 2 tablespoons of olive oil until very limp

— 1/2 c. of flavored bread crumbs – if you are not eating any wheat products, you can replace with the same amount of cooked quinoa or cooked brown rice, barley, buckwheat (yay!) and so on.

— A good grating of black pepper, 1/4 tsp. of smoked paprika

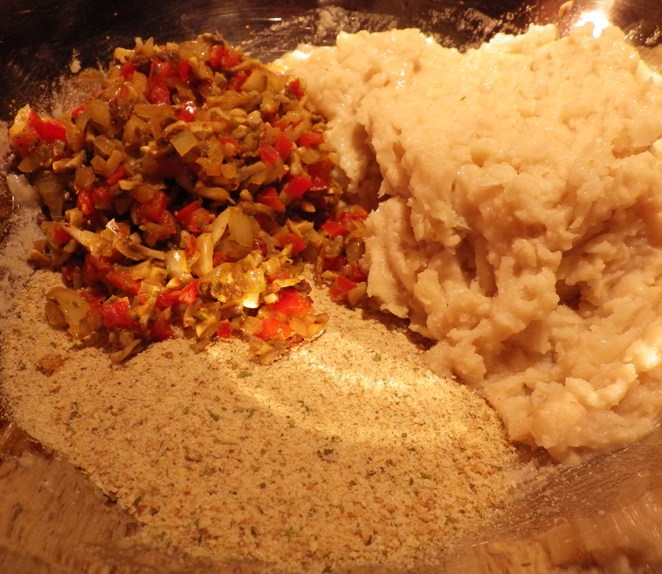
Put the beans, the bread crumbs (or other grains) and the veggies into a big bowl (as the above photo indicates) and mix thoroughly. Take large spoonfuls (a spoon the size of the sort of thing you’d use to drain veggies in a pot – several inches across), form into balls and place on a greased baking sheet. Then flatten with your hand or a fork. You’ll end up with something that looks like this – this recipe makes 8 burgers.cannelliniburgers2

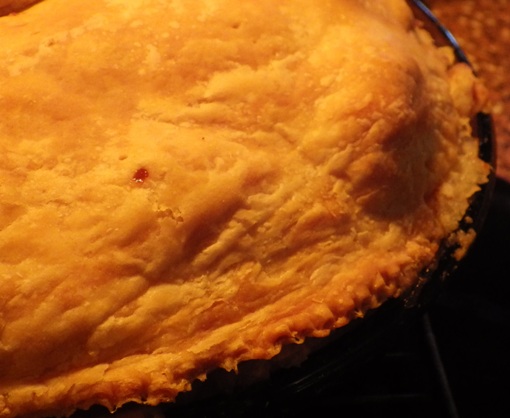
Bake in an oven set at 375 degrees F. for 15 minutes. Then carefully, with a spatula, flip them over and bake again for another 10-12 minutes. This, frankly is just to give the outside a bit of crispness. If you’d rather fry them in a bit of hot oil, then bless you – go for it. Just cover the bottom of a fry pan with oil and heat until bubbling – carefully slip the burgers off a spatula into the oil and fry one side until crispy; then flip and fry again on the other side.

I served these with cole slaw (mine is grated carrots and cabbage with a mayo/vinegar dressing), on whole grain buns that I’d toasted a bit, but again, this was just to give the meal a bit of the ‘summer picnic’ feel. If I was not going to do that, I’d serve them with whole grain pasta or, for people who don’t do grains, I’d do a quinoa salad or potato salad or something like that.

Bon Appetit!!cannelliniburgers3

Winter Beans

beans1Fart scenes in “Blazing Saddles” notwithstanding, beans are good for you.
Need more fiber in your diet? Reconstituted dried beans are definitely your friend.
Want to move away from meat as a protein source? Ditto.
Looking for natural sources of trace minerals? Ditto.

And don’t think you have to eat soy beans (and the processed foods made from them) in order to get the benefits. Yes, soy beans are protein power-houses, but a lot of people are concerned about GMO soy beans By 2012, the US Department of Agriculture estimated that 94% of all soy beans grown in the US are GMO. (more…)

2014 – a year in review

Yoohoo, everybody!! Since today appears to be ‘International Gotta Review 2014 Day” for bloggers, I guess I have to woman up and work my way through the good, the bad and the did..not…work for 2014. Organization, I realize, is everything here, so we will go by topic sub-group so that for those readers who are only interested in one topic, just scroll down until you hit that. (more…)

How to handle Christmas Breakfast

So – is your family a ‘get up at 5 a.m. on Christmas morning, create a hurricane of wrapping paper and THEN eat something’? Or are you a ‘eat something first; then open gifts, then eat some more or something different, go back to the gifts or start watching Christmas movies’ sort?

Well, no matter what sort of breakfast you anticipate for Christmas, here are some ideas which I think are terrific and come under two basic headings:
A) Pull together the night before, leave in the fridge and then cook/bake in the morning while everyone opens the gifts, or…

B) Pull together the night before in a crock pot, turn it on and the whole thing is all finished when you get up so people can eat it whenever they like – before, during, after, here, there and everywhere.

Frankly, either one works as far as I’m concerned because it takes one important item (nutrition – kids don’t live by gingerbread people alone) off the list of ‘to do’ in the morning and allows Mom and Dad to actually enjoy the complete chaos.

Here are some great ideas (and I certainly did not invent them – they are standard breakfast fare, brightened up with some spices and goodies:

Using the Crockpot:
French Toast

No gluten French toast

Breakfast eggs and etc. casseroles Just a note here: Don’t want meat? Don’t put it in.

Overnight oatmeal

Crockpot Cheese Strata

Set up in the fridge and cook when you get up:
Casseroles you can set up the night before

Overnight oatmeal – cold

Now, just a note – if you have the sort of family that will eat anything and everything for breakfast, then you certainly can set up chili or stew in the crockpot the night before, bake some corn muffins and off you go.

Have a good breakfast.

Oh, my gosh, I’ve been missing

snowyfield Well, ‘missing in action’ does not even begin to describe my lack of posting. We’ve been busy-busy (as have everyone else at this time of the year, but we have birthdays as well as the usual holidays so it’s been a veritable factory here at Chez Siberia.

And the elves are all out on strike so it’s up to us. (more…)

How to make an apple pie

pie11 Your dear old Aunty realizes that this might sound a bit silly, but there are people in the world who have never made an apple pie and who dearly would like the experience of making one. And at this time of the year (at least in cooler parts of the world), the availability of apples is pretty much at its height. (more…)

Make dessert a dessert: Chocolate Banana Cream Pie

There are times when right down to the tops of your sneakers, what you want is a dessert that has basically no redeeming qualities whatsoever. I don’t know that anyone can be blamed for that. This is something that frankly, if you know in the morning that you are going to have informal guests that night AND you have the ingredients at hand, you’ve got a great dessert. But be warned: it needs at least 3 hours of time in the fridge to set up properly.

Here is what you will need, besides a pie plate and two ripe bananas (but not mushy – you should be able to smell the banana scent but they will not have reached the ‘OMG – these are only good for banana bread’ stage).
Some sort of pie crust – enough for the bottom of a 9-10″ pie pan. It doesn’t matter if it’s a refrigerated one, graham cracker, something you make yourself or whatever. If it needs baking, bake according to a ‘not filled’ pie for that type of crust and let cool completely.

White Layer: Beat together the following
1, 8 ounce package of some sort of cream cheese – this works equally well with regular ‘high test’ cream cheese, the reduced-fat stuff, the non-dairy tofu-based stuff.
1 tsp. of some sort of flavoring (I used almond for this but vanilla or banana will do – you can even go ‘high society’ and use some sort of fruit-based liquor)
1 cup of confectioner’s sugar

Set that aside – you can put that in the fridge and it won’t harden up.

Chocolate Layer: Stir together in a heavy-bottomed sauce pan
2 packages (the small ones) of ‘cook and serve’ pudding mix. I used dark chocolate, but literally any sort of ‘cook and serve’ pudding will work for this.
1 1/2 cups of milk (again, any sort of milk will do – I’ve even done this with almond milk)
Bring this slowly to a boil, over medium heat, stirring constantly. I use a whisk but a big metal spoon will work also. Once this comes to a boil (and it will have thickened up considerably already), keep stirring until it gets very very thick and you can really feel the resistance against the spoon (that should be about 5 min. but no more – you don’t want this to burn on the bottom of the pan). Take off the heat and set this aside to cool off. You want this to be basically room temperature when you pour it into the shell.

Once everything is cooled, take your cream cheese layer and pour that into the bottom of the pie crust. Then slice the bananas and lay them out, as you see here in the photo, starting at the edge and working your way into the center until the entire surface is covered in sliced bananas. If you want, you can sprinkle cinnamon on top of the bananas and this really perks up the flavor tremendously.

Then, take your chocolate layer and pour that on top. You can also add other dainties on top, such as chocolate mini-chips or toasted coconut. The pudding will support them. The pie will look something like this photo. At this point, put the pie into the coldest part of your fridge and leave it for at least three hours before serving.

Prepare for people to get rude and lick the plates.

Additional notes:
Here’s a great GF crust for this: 2 cups of almond flour, 2 Tablespoons of butter or solid coconut oil, 1/4 cup of cocoa, and one egg. This will have the qualities almost like a wet graham cracker crust. Press this into the pie plate and bake at 350 for 12-15 min. and cool.

Please note: You can also make this into a frozen pie. Here is a photograph of what this pie looks like once it’s frozen. As you can see, the texture is completely different, at least in the chocolate layer. The white layer does not freeze hard – so it’s more ice cream in texture while the chocolate part has definite crystals. I think it changes the dessert into something completely different and actually quite delightful – reminds me of ‘fudgesickles’ (if you are old enough to remember those) in a pie crust, actually.

More good for you beans!

Yes, I know it’s summer and the grills are just hopping out there. Who wants to read about more bean dishes, right?

Well, you can’t eat meat all the time. A couple of vegetarian meals a week is not going to hurt anyone and these garbanzo bean burgers (say that three times fast) are tasty, filled with protein and fiber. You can definitely give yourself the old ‘oh, what a good boy am I’ when you eat them. I served these without any sort of bread, but you can treat them like a burger and serve on a whole-grain bun as well, with condiments, cheese, tomato and whatnot.

Here’s a rundown on garbanzo beans for a one-cup serving:
Protein: 14.5 grams
Folate: A serving has 71% of all the folate you need in a day.
Dietary fiber: 12.5 grams – that’s 50% of what you need in terms of dietary fiber in a day.
Vitamins and Minerals – all sorts, but they are the champs in Manganese.
Glycemic Index: 17
For more detail, go here: Nutritional data on Garbanzo Beans

So, how do you make garbanzo bean burgers? Well, the first thing to remember about working with any bean product to make patties is that the beans by themselves are really rather bland. That is actually good because you can, through the use of other veggies like onions and various spices, zip up the taste.

Here is how I made these burgers:
One can of garbanzos, rinsed well and mushed up a bit (don’t mush them completely because then the burgers don’t have any texture to them. Leave some beans whole or just a little bit mushed).
One small onions, finely chopped
1 Tbsp, dried dill weed
2 large eggs
1/8 cup of olive oil
1/2 tsp. of powdered garam marsala
1/8 tsp. of smoked paprika
1 cup of seasoned bread crumbs

Mix all of this together and form patties – it should make four, good-sized patties.

Then, mix together the yoghurt sauce (if you are going on the Mexican side with your spices, perhaps you’d rather use salsa for this):
1 cup of Greek yoghurt
1 green onion, finely chopped
1 tblsp. finely chopped cilantro

Mix all together and put in a bowl in the fridge and ‘marry’ up the flavors.

While you are waiting, you can cook the patties.
Using a non-stick fry pan, put in a tablespoon of olive oil and put it on medium heat until the oil thins out and runs over the bottom of the pan. Carefully put the patties in and cook, on medium heat for 4-5 min. Keep an eye on them to make sure they do not scorch too much.

Flip with a non-stick spatula and cook the other side for 4 min. until all warmed through.

Serve with the yoghurt sauce and a big salad.
FIBER CITY!!!

One a penny, two a penny..hot cross buns

This is the time of the year when you can find all sorts of seasonal/holiday treats in your local grocery store or bakery (if you have one). My seasonal guilty pleasure are hot cross buns. I have not had them in years but my brain certainly remembers the taste and so..I picked up a package along with the rest of the grocerias. When I got home, I settled myself down with a cup of tea and one of these shiny buns with the sugar cross on the top.

Tasted … just…like…paper towels. For a second, I was wondering if it was me, somehow. I have had a nasty cold for a while, so I tried out one of them on the DH. Ditto. So, I checked the ingredients.

No eggs. No milk. No butter. No wonder…. (more…)

Think Irish? Think Lamb!

Yes, yes, I know, St. Patrick’s Day is coming up fast and the usual thing is corned beef and cabbage. But, let me make the case for something else: lamb.

First, let’s look at this historically.
Anyone in Ireland who ate beef was probably a) rich and b) not Irish. Raising beef takes a lot of land. For the amount of land you need to raise a beef cow, you can raise a small herd of sheep. Which is why lamb and mutton has always been far more available and popular in Ireland than beef because even if you were a crofter and had only a small patch of land to work with, you could raise a bunch of sheep and have not only meat but also wool. So, if you want to be ‘Irish-Irish’, eating lamb is just more Irish than eating beef of any sort to celebrate St. Patrick’s Day.

Second, let’s look at this nutritionally.
Courtesy of our friends at nutrtional data, for a 3-ounce portion (and I think we can all accept that no one actually eats JUST a 3-ounce portion, but at least we are comparing ounce for ounce here.
Cooked Corned Beef…………………………….Roast Leg of Lamb
Calories: 210……………………………….220
Fat: 15 grams……………………………….15 grams
Protein: 15 grams……………………………..22 grams
Sodium: 960 mg……………………………….55 mg.

These last two are the bell-ringers here. Lamb, ounce for ounce, has more protein than beef does, though it does have the same amount of fat, so in terms of ‘protein bang for the buck’, lamb wins here. Secondly, and I think from a health perspective, even MORE importantly, corned beef is a just a huge sodium hit and I realize for a lot of people, that is the entire point of eating meats like corned beef and pastrami: they love the salt. Well, the salt does NOT love us or our hearts or blood pressure. That 3 ounces of corned beef (and again, who eats just a 3-ounce portion – that’s the size of a pack of cards) is way too much and let’s not even discuss anything else that will be eaten with the meal, like potatoes (going to salt those, too, right?). So, roast lamb wins out here too. Just 55 mg. of sodium. That’s one of those ‘pat myself on the back’ meals right there.

So. For those folks out there who have ‘Fear of Lamb’, here is Aunt Toby’s handy dandy so-simple it hurts roast leg of lamb.
You’ll need:
Meat thermometer or probe
Boneless leg of lamb roast – 3-5 pounds, fresh or defrosted, at room temperature
5 cloves of garlic, chopped fine.
Several sprigs of fresh rosemary with the leaves removed; save one for the top of the roast.
Small baking pan
One medium sized onion, sliced up

This is going to take a couple of hours, so don’t plan for this being something you can throw into the oven when you get home from work on Monday night, ok?

Pre-heat your oven to 350 degrees F.
Take your lamb roast. It is probably either trussed up with string or it’s in one of those elastic nets. Take off the net.
Flip it open or unroll it depending on how the butcher did the deed. Take all the garlic and spread it onto the cut surface of the meat. Then sprinkle all the rosemary leaves on top. You should have the same amount of coverage as you see in the photograph here. Then take your black pepper grinder and grind a couple of good strong grinds of pepper on the surface. Then re-roll the roast or flip back the outside on top.

Now, how are you going to make this thing hold together while it’s roasting. If it was trussed with string, use the string you took off to unroll it and wind it around again after you’ve rerolled it. If your meat came with one of those elastic nets on it, here is the way you get it back on again without the whole thing flipping out and ending in a wreck on the kitchen floor.

Put the net over the ends of your hands, as in the photograph and put your hands over the closed end of the roast. Move your hands forward until you have the netting about half-way up the roast. Then take your hands out of the net. Use your fingers to pull the ends of the net over the front and back ends of the roast. Voila!

Take your baking pan and put your sliced onions into the bottom in the center. Put the roast on top of that; this will prevent the roast from sticking to the bottom of the pan.

Put the pan into the 350 degree F. oven for 30 minutes. At the end of 30 minutes, turn the oven down to 170 degrees F or the lowest setting your oven has. Yes, I know this is sort of scary — but lamb does not take well to high heat. If you have horrific smell memories of Sunday lamb roasts, this is the reason why – the fat was burning in the high heat. Lamb does super well in ‘low and slow’ cooking. Leave your lamb at this low temperature for an hour and stick in the probe or meat thermometer to test the center for temperature. You are looking for 160 degrees F at the center. If it has already gotten to 140+ but you are looking to speed this up, you can raise the oven to 250 degrees F and the roast will not suffer – the outside will get a bit crunchy-er which some people like.

Once you have reached 160 degrees F at the center of the roast, take the pan out, wrap the meat in the foil tent and prepare the other side dishes (I am pushing Brussels Sprouts this week, but to each his own), and serve.

NO MINT JELLY.

Bon appetit!!

Blog Widget by LinkWithin

Bad Behavior has blocked 850 access attempts in the last 7 days.