 Sometimes, when Aunt Toby is considering a new sewing project, it really behooves me to actually think out the issues of ‘what am I trying to do here” and “what’s the end result” before I buy fabric. I realize most of us who sew have advanced cases of ‘stashaholism’ and could lay our mitts on at least one piece of fabric to make something at any given moment. One of the problems with buying fabric off the internet is that unless you subscribe to the policy of ‘swatches first/purchase later’, you are totally dependent on the photograph and description on the site.
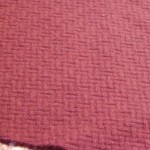 “Wool coating” is not all the same. When I bought the basketweave coating (and it’s so long ago I do not recall even from whom I bought it), I envisioned something that was a lot thicker, a lot more tightly woven, a lot more ‘winter coat-ish’ than what arrived. Even from this little photo, you can see that it actually LOOKS pretty thick and spongy. If I’d gotten a swatch, I would have held it up to the light and seen this.
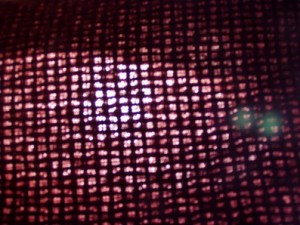 Given that the end goal for the coat is ‘something that will look nice and dressy but will also keep me warm enough that I can still do the 30 min. walk to work in January’, I should probably have bought something else. Melton cloth perhaps. Or, perhaps I should have gotten some nice wind/rain proof fabric for the outside and made a wool-lined raincoat instead. But I didn’t. I got the brown basketweave.
Which is why this coat, once I really got cranking on it, has taken soooooo long. The fabric is, ahem, shall we say, not exactly wind proof. Which meant that I absolutely had to not only put some sort of fusible interfacing on it to hold it together and perhaps seal it up a little bit, I had to also interline it. I chose thinnish wool flannel (which I got from fabric mart), which I ran through the hottest water in my washer and steam pressed to shrink the heck out of it. And I’ve also gotten some wonderful heavy flannelized lining from Haberman Fabrics to line it.
This coat is going to weigh a ton.
There are a lot of other sewists out there who have made and are currently making coats. There is a level of expertise out there that is truly astonishing – having this available is one of the fantastic benefits of sewing on the web. As usual, however, your dear Aunty has decided to stumble through this activity, with nods here and there to what I think are the best ideas that I can use.
1)  Modifications to the pattern. As you can see from the diagram, both the upper yoke and the back bottom of the coat have center seams. I took out the center back seams on the upper yoke and the back ‘skirt’ of the coat. The only reason I can see for having a back seam is to put a kick pleat in the coat and since this is a swing back, I did not see the need for it. Second, when you interline a coat, as you can see from the pieces in the photos, you have to sew the interlining just UP TO the seamline. Eliminating the center back seam eliminated some hand sewing. Yes, Aunt Toby has a major laziness factor to struggle against – and sometimes, laziness wins.
2) Modifications to the technique. Another way to deal with the whole ‘interlining to the seam’ business is to …ignore that. In the front of the pattern, there is a princess seam going from the shoulder down to the bottom. Not wanting any MORE bulk in the (ahem) front, I sewed the side and center front pieces together, steam pressed the heck out of them, put in the hair canvas pieces by hand and then used this complete unit as the pattern for the interlining piece, trimming off the center front edges 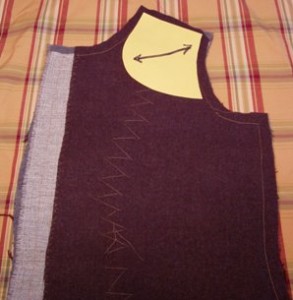 . Yes, I had to catch stitch the interlining along the princess seam, but this did eliminate some hand sewing. In the photograph, you will see a piece of yellow paper with a grainline arrow on it – this is my coy method of letting you know that under that interlining is not only one layer of hair canvas there, but two, with the second piece in that shape of the yellow piece of paper. This is, in men’s tailoring, called ‘the chest piece’ and in men’s tailored coats and jackets, this supports the area of the anatomy between the shoulders and the widest part of the chest, which without some support would actually collapse. In formally tailored garments, they even pad that area. What I did was cut a chest piece on the bias grain (thank you Tailoring) and then I fused it to the already sewn in hair canvas using fusible web (see, I told you I was lazy).
3) Sleeve interlining. Some books advocate only interlining the top section of the sleeve, but I felt that with the outer fabric being so ‘air-conditioned’, I would be sorry if I did not get some interlining into that sleeve, especially on the outside. So, that’s what I did. As you can see from the photo, it is not only interlined, but also has a muslin ‘stay’ (thank you Erica Bunker) in it as well. Erika would have put a muslin stay in the yoke but I figured that the hair canvas being sewn right to the coat fabric was ‘stay’ enough.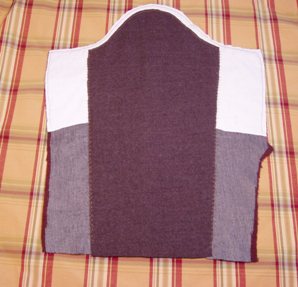
The back is done. I sewed down the pleats and steam pressed them separately from the rest of the back. The fronts are done, as are the sleeves. 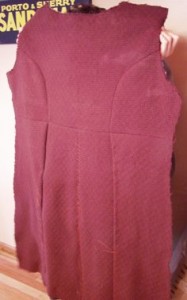
Next up? Attach the fronts to the back and then…
(Cue scary organ music)
Putting in the sleeves.
Until the next time….

Wow, what a process you got going there. I know when I’m working on a project I muddle my way through taking into consideration what my laziness is and what I know I can and can not do well.
Thanks for sharing. And I always have to see of feel a product before I buy it. Sometimes though that’s not possible, and usually I am disappointed when it arrives.
Well, I tend to turn things like this into a real construction project. One of the reasons I sew is that everything I buy disappoints me so much. The expensive coats are made just like the cheap coats (and usually by the same people). Everything is cheapened, especially the linings. I absolutely hate that. The lining is the actual ‘business end’ of the coat because that is what is next to you and gets all the abrasion for what you are wearing. One of the things that drives me nuts about my husband’s suits is that the lining in the coats is so damn cheap. He has to wear a walkie-talkie at work and it just shreds the coat linings. I’m thinking of taking some of this super duper coat lining and adding an extra 6-8″ at the bottom back of his suit coats.
Can’t wait to see more.