
 So, what can we do about this armscye issue? Well, I’m no good at redrafting patterns. I admit that and hope someday to ameliorate that situation. But I’ve used a particular technique several times and it does work. As you can see, the underarm seam is just too low. But how low IS it? I need to find out where my armpit actually is in comparison to the sleeve seams here on both the front and the back.

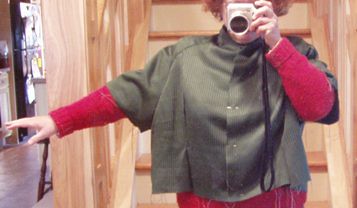
Like many processes in sewing, this one really works better with the help of a second person so that you can point with a finger where you want the pins to be inserted on the muslin. With the assistance of my helper (ahem, the DH, ahem) , I marked the spot where (the top bow) my arm meets the top of my chest and (the bottom bow) where my armpit is, both in relation to the sleeve front seam. My helpful assistant marked the same two places on the back sleeve seam. As you can see from the distance between the bottom bow and the bottom of the sleeve and where the sleeve meets the body of the coat, that’s WAY too low. How to bridge the gap?
I have had horrible luck with redrafting patterns and getting the whole ‘where the armpit meets the road’ spots to line up correctly, but I have had pretty decent luck using something that is frankly a pretty low-tech and traditional clothing design feature: a gusset. Gussets come in all sorts of shapes and sizes and are a standard feature of items with Dolman, kimono and other non-set-in sleeve designs to provide wearing ease and movement. Gusset
The way I use a gusset is this:  In the muslin-fixing phase, I’ll open up the underarm seam between the points that I’ve marked where my arm meets my body (in the other photo, it’s the top red bow), both front and back. I pick up the sleeve and pin it so that I have a flat surface to work with.
Measuring the gap that is created, I take a piece of fabric and make an eye-shaped gusset that is slightly larger than the hole. In this case, the gap was about 7″ x 7″.
Pinning the fabric under the hole like a patch, I’ve bridged the gap. Here is how I fix the muslin with this: Opening up the seam where the sleeve front and back come together and the side seams, I split the gusset vertically up the center. Then, with a pen or marker and using the other seam lines, I create the new horizontal lines and cut along those. Then, when I take the muslin apart to put all of my changes on the paper pattern pieces, I have the new, raised armscye, nice and flat to use to change the paper pattern.
Of course, because I’ve divided up this added fabric into four separate places, it’s no longer a gusset when I actually make the garment – but it fits under the arm as if I did have a gusset there.
