 Sometimes, it’s actually quite overwhelming to try to get your arms around what you are actually going to do. Of course, the simplest thing to do is to just go out and buy pillows or pillow covers, but perhaps you can’t find anything that is either in the budget or that you like or that fits the decor/colors and so on. So.
Next most simple thing to do: Find fabric that you like and make pillow covers out of that. Measure the pillow form as per the instructions of the last post, make a paper pattern of that and cut out a front and a back. Sew up three sides, put in the pillow form, fold in the open edges so that it fits snugly and whip stitch it closed. Voila. Done. Could not be more simple. If you want to put in a button flap or a zipper, we’ll cover that next time but this truly is the simplest way to get a pillow cover you like and you can make a mess of them before you go bonkers and find yourself with your held in the fridge.
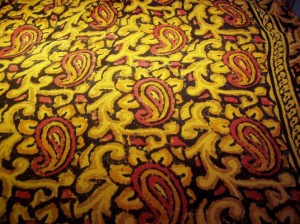
Other things you can do: Find fabric which perhaps is not perfect, but you like it and are willing to (as Tim Gunn would say) “make it work”. Above is a photograph of just such a fabric. It breaks all my known rules for fabrics for pillows: It’s loosely woven and thin. It’s actually an old (and that works against it too) Indian print bedspread that I had in the cupboard. How do we make this fabric work? Well, first thing, you need to find a place on the fabric that works for you.
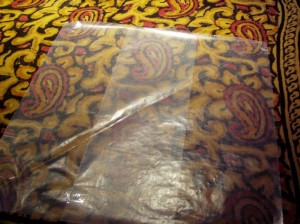 Using something that you can actually see through (such as tracing paper or, in this case, waxed paper), cut out a pattern exactly the size of the pillow cover (in this case 18″x18″) and move it around the fabric until you find an arrangement under the paper that you like. Pin the paper down and cut it out.
First Principles: Stabilize the heck out of it. There is nothing like fusible interfacing to stabilize something like this (the best stuff out there on the market is produced actually by Pam Erny for her business Fashion Sewing Supply). Cut out your piece of fabric to the size you want and iron it so that it is flat and has no wrinkles. Cut a piece of interfacing exactly the same size and slowly iron the interfacing to the backside of the fabric. Then flip it over and press it again – you don’t want any bubbles or wrinkling. The interfacing and the fabric are now one and will be treated that way. If you are using this sort of fabric for both the front and the back of the pillow cover, then stabilize both pieces.
So, now you have a stabilized pillow front? What can you do with it?
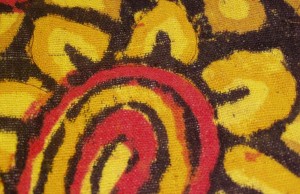 You can quilt it – all over or only on top of certain motifs. The simplest way to do this is to get odd pieces of polyester fleece, pin them behind the motif or motifs you want to quilt, pin it through all sides and use the sewing machine to sew around the motif. Then using a small sharp pair of scissors (or duckbill scissors if you have them), cut off the excess. It will look then, on the back, like so:
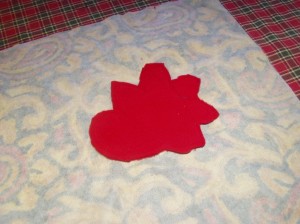
What else can you do? Well, you can add a motif from another piece of fabric.
In this case, I created a screen (which is frankly like a stencil actually but we will discuss this for another time) using an image from a Dover Publishing book and with fabric paint, I printed it onto a plain piece of fabric. I then ironed the image to make it permanent and stabilized that with fusible interfacing, ironing down the edges.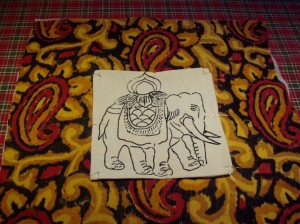 I’ll sew around the box with matching thread. Done deal.
Other things you can do: Avoid the issue of making pillow covers at all. Buy them and dye them. Dharma Trading Cotton Pillow Covers carries both cotton and silk pillow covers with zippers in them that you can use just as they are, paint them, dye them, screen print them, you name it. I chose to dye mine first, in a lemon yellow (you can get all sorts of paints, dyes, etc. from Dharma Trading as well or you can go down to your local store and get Rit or one of the other ‘union’ dyes). As you can see from the photo, the zipper does not take the dye. Just a word to the wise and all that. 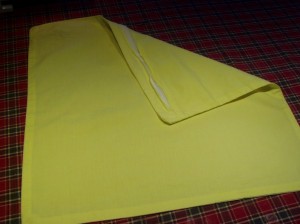
So, what can we do with this, now that we have a lemon yellow pillow cover? Well, if I were a better artist, I’d paint them up but my skills in that area are sort of lacking. But here are a few ideas:
Add motifs: In this case, I cut out (no, these are NOT ducks — stop sniggering back there) paisley shapes out of a basic color and then cut out printed fabrics in a slightly smaller shape for the insides. I stabilized the largest one and plan to put both pieces together and sew them individually onto the pillow cover.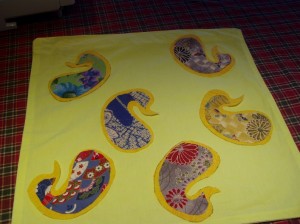
Add printing and embroidery:
On this one (remember this guy?), I screen printed the elephant in blue and started embroidering with colorful flosses. Yes, this takes a bit of time — another way to achieve the same sort of effect is to screen print the motif and then take fabric paints (slip a piece of cardboard on the inside first so that it doesn’t bleed to the back) and a small brush and color various areas that way.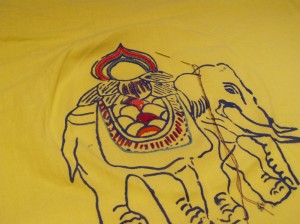
So, there you go, just a few ideas for the pillows.

Yay for the shout-out to Dharma. I have been doing business with them from their very first year, through all my moves all over the country. They’ve stayed in business for 40 years (oy! are we that old?… yes) by hitting the Business Trifecta of great prices, great products, and great customer service. I love the goofy catalog with its honest product descriptions. So I rave about them whenever I can.