In our first episode of the kitchen chair Pull up a chair, we got the seat off the frame of the chair, took off the coverings and made a pattern. We also cut out the foam for the underseat and secured it to the seat itself with sticky tape.
Today, we make the seat beautiful again. You will need:
Fabric to cover the seat
Scissors – one large and one small for trimming in the corners.
Cloth tape measure
Staple gun
Hammer
Your seat pattern
First, let’s discuss fabrics. These chairs originally came covered in heavy black vinyl. I’m not a huge fan of plastic-covered chairs because I don’t feel anyone likes to stick to the chair when they get up. But if you would like to cover your chair in vinyl, you can sometimes find it at chain craft/sewing stores or you might be able to buy an end remnant from an auto seat upholstery shop. I like the look of fabric so that is the way I’m going with this project. For all this is a simple sort of thing, it is a bit of effort on your part, so make sure you get heavy fabric that will wear well, such as tapestry cloth or even heavy denim or canvas. I think tapestry hides spots and stains a bit better, but I think denim wears well, especially if it has a bit of polyester in it.
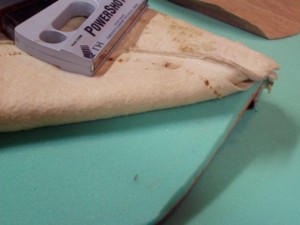 Step One: Stacking the support. As you can see from this photo, the order that I am using for this is the wooden seat, then the foam, then the piece of felt. This will give you smooth contours, especially over the lip at the front edge. The felt will stick to the foam, so you don’t need to secure that. But you will need to stretch the foam over the lip in the front and secure it at the edge of the lip with a couple of staples. Then, take out your measuring tape and gently (that is, don’t pull this tight) measure from where the old fabric cover was stapled, around the top and back around the other side to where the old cover was stapled. Do this horizontally across the widest part and vertically. If you have a lip like this at the front of the chair seat, don’t forget to include that and the back of the lip so that you have enough fabric to staple down at the end.
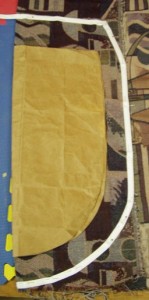 Now it’s time to cut out your fabric. I’ve folded the pattern in half and put that on a fold of the fabric (straight of the grain running vertically across the seat, front to back). So, what’s the white tape outline going around? Well, when I measured around my seat, I found out that with the added foam, I needed 2″ more around and 3″ at the front. So, measure the seat with the foam and any other padding before you cut. Saves tears and aggravation (and trips back to the fabric store only to find out that they don’t have any more of the fabric YOU like).
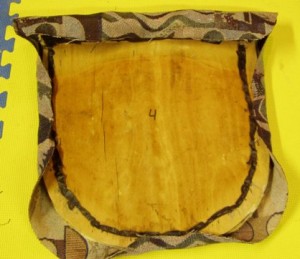 I like to think about a chair seat (even if it is not round like this) as a clock. I lay down the fabric (wrong side up) and place the seat and padding stack so that there are even amounts of fabric all around except for the front where I need more because of the lip. Then, I fold over the bottom edge and pull it to the bottom of the seat which is facing me at what would be 6 o’clock, and put in a staple. Then, I pick the whole shebang up so that the front of the seat is facing me and across from where I stapled before at 12 o’clock, I fold over the fabric and stretch it over the lip and secure it there. Then I go to 9 o’clock and 3 o’clock and do the same thing, being careful to stretch the fabric over the edge so that it is tight when I staple it. You always want the fabric tight because if you don’t, then you’ll end up with wrinkles in the top, which will wear badly. The fabric on the seat will stay nicer longer if you pull it tightly to the back like this.
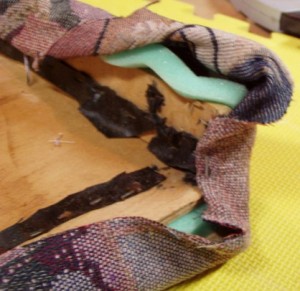 You’ll be working from the round back of the seat and up the straight sides toward the front. When you get about 2/3 of the way up on each side, you need to stop working there and go to the corners where the lip attaches to the seat. You want a nice neat fold there – this is really quite like making a bed. Pull the fabric around tightly from the front of the lip and secure; then, pull the fabric from the long side closest to the corner and secure that as well on the underside of the seat. This makes a very neat corner and a nice finish. Then do the other side.
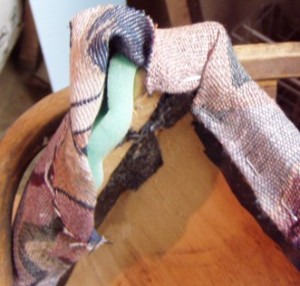
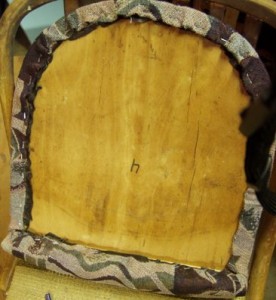 When you are done, the bottom of the seat should look something like this – fabric edges neatly folded over and secured with staples. Turn the seat over and check the top – is the fabric nice and tight? Smooth? Check the staples; if any look a little loose or if they did not go in squarely, take out your hammer and give them a smart smack to secure them. If the fabric top does not look as tight as you would like, you can always remove a few staples on the underside of the seat nearest the offending area and pull the fabric tight and staple again. It really is worth the extra little effort to do it – you can remove the staples with a slot headed screwdriver.
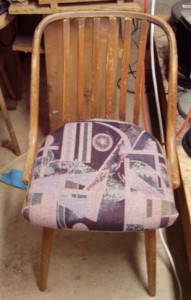 So, here is what the seat looks like back in the chair. As you can see, in comparison to how it looked before, this is a big improvement, but the chair frame looks much the worse for wear. That is what we will tackle next.
