Kitchen Counter Economics Rotating Header Image

Cooking It

Kiddie Food

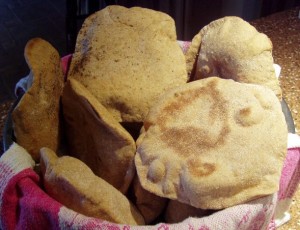
We all have connections with food that we ate when we were young (shoot, Proust wrote a 900+ page novel based on his scent memory of what is actually a rather small vanilla cookie). Whether it’s some sort of soup or mac and cheese or a cookie or pie only made at holiday time, we all have these memories and feelings associated with food from his period. Of course, there are always the emotional ties involved with who was making them, how we felt about that person, the circumstances associated with them (were you standing on a stool with a huge apron hiked up around your armpits helping, covered in flour from head to heels?) and so on.

But sometimes, whether it’s due to the weather (more…)

Liquor Gifts: What to do?

If you are the sort of person/couple/fam that receives liquor gifts at the holidays or gets ‘regifted’ liquor from family or friends, then this post is…for..you.

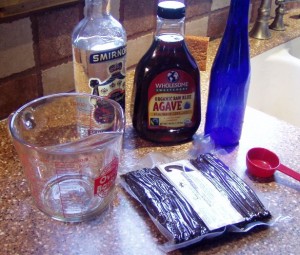
Here is a way to create an even better gift (if only for yourself): Make vanilla extract. Actually, you can use the same technique to make other extracts as well.

For vanilla extract, all you need is liquor of some sort (whiskey, vodka, gin, tequila), fresh (not dried) vanilla beans, and some agave syrup (we’re using organic for this). To get fresh vanilla beans, search on ‘fresh vanilla beans’; don’t use dried. It works but it’s not as good. Ours came in a vaccuum-sealed bag. You will want to have at least 5 beans for a big bottle; preferably 10-12.

Why bother? You can buy vanilla extract (more…)

Stalking the Wild Spaghetti Squash

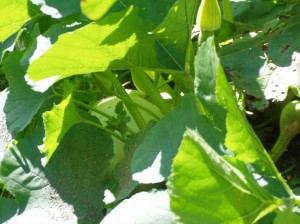
Shhhhhhhh. We’ve now encountered the elusive spaghetti squash in her native habitat. If you look carefully, you can see her crouching here, under the large spiny leaves toward the back. (more…)

It’s that time of the year: Tomatoes

I used to have a coworker who’d literally leave bags of produce from his garden on your desk. Leaving a big display with a polite sign in the break room was definitely not his style; he could not imagine anyone NOT wanting zucchinis of a size that required a saddle and bridle. And since he grew several different types of tomatoes, you had to have large samples of them all.

There were the sneaky people who’d run down to the dumpster on their way out; the rest of us just exchanged recipes.

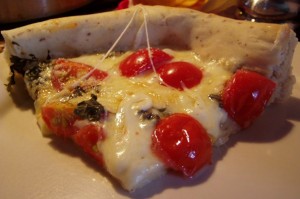
So, here’s a quick and easy dinner idea if you become the object of a tomato-raiser’s affections: Tomato Pie. This is a real ‘taste of the season since it uses fresh herbs and straight off the vine cherry tomatoes.

You’ll need:
Pizza dough (whatever you got, including the ‘I just picked this up at the groceria on the way home’)
Several cloves of garlic (at least two huge ones)
Olive oil (the light stuff; not the green ‘extra virgin’)
Fresh basil (and oregano if you can get it, too), a big bunch, washed and the leaves taken off the stems, coarsely chopped
Big handful of cherry tomatoes – depending on the size of the pie and the size of the tomatoes, it could be a dozen, washed, quartered, with the little green bits at the stem ends removed.
Grated Romano cheese (or whatever mixture of dried grated Italian cheese in a can you’ve got in the fridge or on the shelf)

Pizza pie pan (this one is made in a 10″ cake pan for that deep dish look)

Prepare the garlic:
Peel the garlic cloves and mash, or put through a processor, or grate on a grater
Add several tablespoons of olive oil and mix until you have a creamy paste

Pre-heat your oven to 400 degrees F. Put a rack on the bottom rung of the oven.

Put your pizza dough on a greased pizza pan or whatever pan you are going to use. Spread it out.

Spread the garlic/oil paste all over the pizza dough (we’re doing this to seal the dough against the moisture of the cherry tomatoes)

Sprinkle the chopped herbs all over the garlic paste.

Sprinkle the chopped tomatoes on top of that; try to get them as even as you can and with the cut sides UP.

Sprinkle a good slug of the dried, grated Italian cheese on top of the tomatoes.

Put on the bottom rack of the oven for 15 minutes. At the end of 15 minutes, check the crust – it should be crispy. If not, leave in for another 5 minutes and check again. If you have to, use a spatula and lift it up and check how crispy it is on the bottom – if it’s crispy, it is DONE. Take it out, immediately cut into pieces and everyone dig in!!

Totally Worthless But Yummy: Chiffon Cake With a Surprise

When the Little Siberians(tm) were young, they accused your dear old Aunty of sticking all sorts of nutritional boosters into baked goods, from the philosophy that if they were going to be eating them anyway, the least I could go was take a bit of the naughtiness out of them. They were actually right – dried milk, soy flour, you name it, I put it in.

One bite and you just KNEW. Eau de soy bean. Every…single…time. And bless them, they’d work their way through them just to feel that they’d gotten some sort of a treat out of it. (more…)

Hold the Salt

Your dear Aunty is here today to do a little bit of food and health stuff. Today’s topic is salt.

If you eat processed foods (that is, you buy them in a can, bottle, box, tub or plastic bag at your grocery store), you are getting a lot of added salt (we are not discussing what takes place in restaurant kitchens — that’s a topic for another time entirely). Everything that food processors create, whether it’s cheese of any sort, baked goods, cereals, canned veggies and so on has added salt. Many food items, just by themselves, naturally, have a lot of sodium in them, so you need to understand where you can make changes and where you can’t.

For example: Liquid milk, all by itself, has 100 mg of sodium per cup. One cup of 1% fat cottage cheese has 918 mg of sodium in it. Why? Well, first of all, to create one cup of cottage cheese takes several cups of liquid milk, PLUS processors are adding salt to the process, first to pull off the whey to create the cottage cheese and second for what they receive is the consumers’ taste for saltiness in the cottage cheese.

Now, just for a moment ask yourself this: How much salt do healthy people need – that is, what’s the recommended daily allowance for sodium? And, if I’m not such a healthy person – how much, if I have a family history of heart disease, or already have high blood pressure, or I have kidney disease, should I be allowing myself? (more…)

Salmon Burgers for the sodium challenged

A couple of years ago, we found a family who live a couple of hours away from us, who have a business whereby they go up to Alaska and fish for salmon. They have it processed up there and sent back and they sell it locally. So, we buy their product because a) it’s cheaper than any wild salmon we can find in stores locally and b) it’s supporting a small local business.

One of the products they sell is a wicked salmon burger (which is probably made out of all the trimmings left over after the fish have been made into filets). These burgers are very tasty, and made with dill and feta cheese. They are a quick and easy dinner – pull them out of the freezer, throw them into a pan on the stove or bake them in the oven, make a salad and another veg and off you go.

Seriously, they are amazingly good. Except for one thing – the amount of sodium in them would stop a horse. Since the DH and I like to watch our sodium intake (yes, your dear Aunty has entered the age when watching the sodium is an important thing), this is very upsetting because we really like those salmon burgers.

So, I threw the kitchen at Chez Siberia into complete chaos today in efforts to figure out something sort of like those salmon burgers but without using a high salt cheese (now, if you can use canned salmon to do this also, you just have to go down to the bit after I’ve worked with the fresh fish – Step 3).

To do this, you will need the following (this makes 8 burgers):
— About 1.5 pounds of salmon fillets, or an equivalent amount of canned salmon
— 1 cup Ricotta cheese, drained (I put mine in a fine sieve in the fridge first thing in the morning for a couple of hours and it worked like a charm)
— 1 Tblspoon of dried dill
— 1 tsp. oregano
— 1/4 c. of breadcrumbs (if you have flavored ones, they tend to mask the flavor of the dill a bit but it still tastes very good)

Step One: Get the skin off the salmon. This is the only somewhat tricky bit.
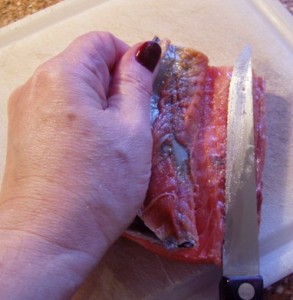
Holding the fillet skin down, carefully cut at one end down through the fish until you get to the skin.
Flip it over and as you see in the photo at the top, start peeling the skin away with one hand while you carefully slice away the fish from the skin. If you leave some fish on the skin, that is OK — just use your sharp knife to slice that away at the end and throw that into the bowl with the rest of the fish.

Step Two: Chop up the fish.
You can use a food processor for this, but I like to go through fish with my fingers to make sure I have not missed any bones. So, once you’ve done that, if you have a food processor, just throw the fish in, and chop it up. I just used a knife and chopped it as finely as I could. Put the chopped up fish into a big bowl.

Add the Rocottoa, the dill, the oregano and the breadcrumbs, mix it up thoroughly and start making burgers.
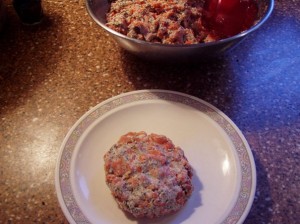
I used a half-cup measure and this makes a really nice burger. Remember – this is salmon and the ricotta does not shrink either so this burger will stay nice and big even after cooking. If you want to serve this on a bun (whole grain, please… or GF if you swing that way), you’ll need a regular sized bun. These burgers do not shrink in cooking.
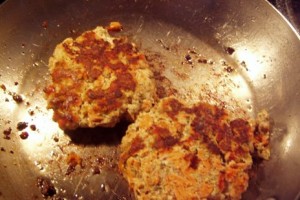
I tried these out both baked in the oven at 375 degrees F. for 20 min. and in a frying pan with a little bit of oil, five minutes on a side. Both methods work fine with these and they tasted great. Did they taste like the commercial feta and dill ones?

No. I have to tell the truth. They don’t. They also don’t have all the sodium, either.
Just for a point of comparison:
1 cup of Ricotta Cheese: 200 mg. of sodium
1 cup of feta, crumbled: 1460 mg. of sodium

So, there you go.

Two Dead Bananas

There comes a time, my little wombats, in everyone’s life, when you are left with two bananas which are, shall we say, ‘long in the tooth’ and your ‘go-to’ dead banana recipe calls for three and then, where are you?

Well, for one thing, you are there with two dead bananas and either you give up the ghost and pitch them into the compost heap or, you start thinking about things to do with said objects.

In my case, I decided that there had to be a better way to deal with two bananas when I needed three. And it was not going to be to substitute a third of a cup of apple sauce or some such weeny thing. So, I looked at all sorts of recipes and everyone has this three-banana fetish. I mean, seriously people. Has no one ever ended up with only two?

In any case, here is what I came up with tonight. I needed a fast little something sort of sweet for after dinner and had a limited number of options in the cupboard, yet at the same time knowing that over-ripe bananas can carry their own, taste-wise, in baked goods and a lot of sins can be masked with chocolate.

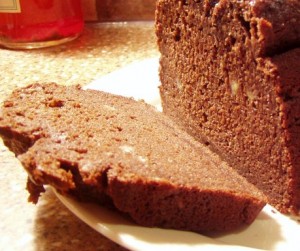
Two Dead Bananas Chocolate Loaf Cake

Ingredients:
Two old bananas, mushed up
3/4 cup of olive oil (or other good vegetable oil – not corn or soy, please, people)
2/3 cup of sugar
3 eggs
1 tsp of vanilla
flour (either 1 1/2 cups of cake flour or 1 cup of all purpose)
1 tsp of baking soda
1/2 cup of baking cocoa
1/2 cup of Greek (or other plain) yoghurt
Possibly: orange or other sort of juice to thin things down if you need liquid
1 loaf pan, greased

In a bowl, put:
Olive oil, the eggs, the vanilla and the yoghurt and beat together. Add the mushed up bananas.
Sieve together the flour, the baking cocoa and the baking soda.
Add, bit by bit, the dry ingredients to the wet ingredients. You should end up with a batter that is a little bit thinner than banana or other quick bread batter. If it is too thick, add a little bit of juice until it comes to the consistency that clumps off the mixer beaters.

Put batter into the loaf pan. Put pan into a pre-heated 350 degree oven for 50-60 minutes, until the top is humped up, cracked and the center is firm. Take out and cool on a rack. Turn out onto a plate and serve.

This needs nothing. No frosting, no meddling with cherry pie filling or any of that truck. Just plain, moist, unbelievably great smelling and tasting cake with a wonderful crumb. If you can’t serve something without any sort of decoration, sieve a bit of confectioner’s sugar over the top before you start slicing it.

More Veggies: Bean Burgers

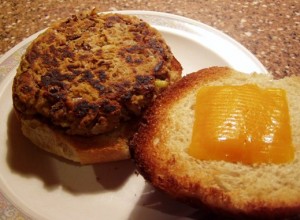
Good morning, my little wombats – in the spirit of making small improvements, your Aunty is offering something that we have had good luck with here at Chez Siberia: The Bean Burger. Now, if you have tried so-called ‘veggie burgers’ in the past and have not been really pleased with them, you and your family might want to try these. They are cheap, taste good, and certainly go a long way to replacing a meat-based meat if that is something your family is trying to do these days. (more…)

Bean Cooking Tip of the Day: Clean ’em before you soak ’em

One of the ‘complaints’ (disadvantages? annoyances?) about cooking with dried beans is that you have to wash and soak them before you cook them. And you need to cook them ‘low and slow’ for a very long time.

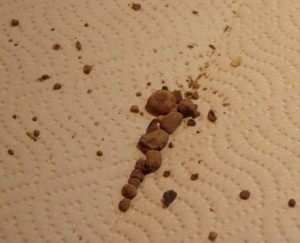
Well, here’s another one, but no one should allow this particular step to stand in their way of making beans from scratch: You really need to go through them and get out all the pebbles and rocks. I cleaned up a batch of beans to start this morning and this is what I got: A bunch of rocks that were bean-sized (makes sense – the screens that the bean processors use would hold back anything larger than a bean, so anything bean-sized or smaller would go through) and a bunch of teeny pebbles.

Any of which, should someone (and with your Aunt Toby’s luck on this, c’est moi) bite into a forkful of beans with one of these items in it, could probably cause a chipped or broken tooth and a very expensive trip to the dentist. I don’t know how much that sort of a trip costs where you live but considering the cost locally, I’ll take the 5 minutes to clean. And making beans from scratch is so much better than using canned (if nothing else, you’ll avoid all the sodium, which no one needs) that it’s worth it.

How to clean dried beans and peas:
You will need the following: A light colored dinner plate, a large bowl, a colander and beans.

Step One: Put a handful of beans on the plate and move them around. Anything that is not the same color, shape or size as the other beans goes out. Those things will be either ‘sick beans’ (which you wouldn’t want anyway), rocks or dirt. When you’ve cleaned those beans, slide them into the bowl and go on with more beans until you have cleaned them all.

Step Two: Put the colander in the sink. Put enough water (at this point, temperature of the water does not matter) in the bowl with the beans to cover and using your hands, swish them around to wash. Pour the whole mess into the colander and run tap water through that. Pour the beans back into the bowl and repeat this process two more times. Your beans are now CLEAN. Now you can cover them with hot water and soak them so that you can cook them.

There you go; you’ve just avoided a trip to the dentist. You can thank me later.

Blog Widget by LinkWithin

Bad Behavior has blocked 378 access attempts in the last 7 days.