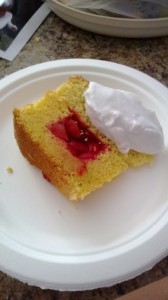
 When the Little Siberians(tm) were young, they accused your dear old Aunty of sticking all sorts of nutritional boosters into baked goods, from the philosophy that if they were going to be eating them anyway, the least I could go was take a bit of the naughtiness out of them. They were actually right – dried milk, soy flour, you name it, I put it in.
One bite and you just KNEW. Eau de soy bean. Every…single…time. And bless them, they’d work their way through them just to feel that they’d gotten some sort of a treat out of it.
I’ve changed my position on this – a treat is a treat is a treat. You don’t want to have to explain what something is because it no longer tastes like anything even remotely associated with cookie-dom. Not worth it.
So, in the spirit of genuine nutritional worthlessness, your dear Aunty offers this cake. All it has going for it is a lot of eggs (and you use all the yolks!), no dairy products whatsoever, and a plop of white stuff on top at the end made out of … wait for it…. coconut milk. Completely empty of any sort of nutritional boosters,but definitely popular (when I made this, people were lining up for seconds and thirds..)
The making, excavation and putting together is a three step process outlined here:
Make and bake the cake.
While it is cooling, make and chill the strawberries and gelatin.
Carefully slice off the top of the cake and set aside.
Carefully make a canal in the cake, excavate the cake bits (and save for snacks later).
Spoon in the mostly set gelatin, set top of cake… on top.
Make white stuff and cover the cake with it or save to serve alongside.
Get it? Got it? Good.
Here we go. For equipment purposes, the only oddball item is: a 10″ tube pan (if you have an angelcake pan, that will work also) and some waxed paper. You will also need several bowls of various sizes. If you have never done the trick of putting waxed paper in the bottom of a tube pan, here is your lesson (you will amaze your friends):
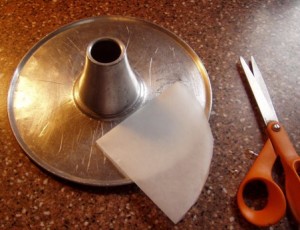 Take the insert of the tube pan (by the way, these are also referred to as ‘spring form pans’ and can come with a tube insert and with a regular flat insert to make cheese cakes) and pull out a sheet of waxed paper that is larger than the bottom of the insert. With a pencil, draw around the outside of the insert and cut it out – you will have a circle of waxed paper (voila).
Fold this into quarters. Holding it with the point at the center of the tube, eyeball down the edge and snip where you think the tube attached to the bottom of the insert and cut a circle. Unfold and put over the tube – the circle you cut out will probably be too small, so keep snipping off bits until it just fits over the bottom. It will look like this: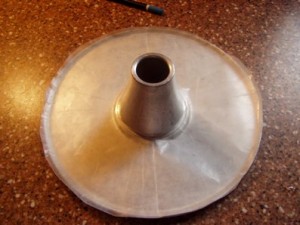 Put the insert with the waxed paper in it inside the outside ring of the pan and close the locking mechanism and put it aside for now.
Making the cake
Ingredients
10 eggs
3 cups of cake flour
1 tsp of orange zest
3/4 cup of orange juice
1 T. baking powder
1 cup of sugar
1/2 cup of vegetable oil (I use olive oil for sauteeing – your mileage may vary)
2 tsps of vanilla
 Chiffon cakes are technically speaking, a second cousin of Angel Food Cake – if you can make AFC, then this is a breeze. If you’ve got Fear of AFC, then this is a good first drill. Once you’ve done this, AFC is a breeze.
Preheat the oven to 325 degrees F.
Sift the flour, baking powder, zest, and sugar into a bowl
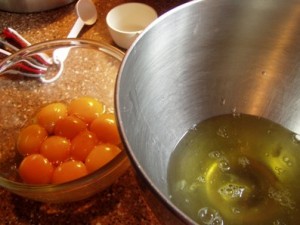
Separate the eggs(for the unitiated, see photo – the whites are in the mixer bowl first)
Using the whisk attachment (if you have one; if you don’t, just put the mixer on the highest speed it has) and whip the egg whites until they are stiff (see photo)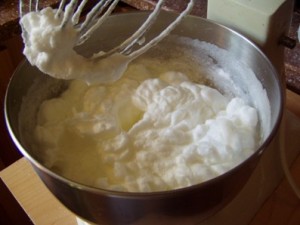 Empty the whites into another bowl and wash out and dry the mixer bowl.
Into the mixer bowl, empty the bowl of egg yokes. Put the mixer on low and mix the yolks up. Then, slowly add the vegetable oil in a thin stream. Then add the vanilla. Then take the bowl of white and scoop out about 1/4th of the whites into the mixing bowl and mix into the batter thoroughly. Slowly add, cup by cup, the sifted dry ingredients. As it starts to get thick, add, little by little, your juice. If it gets too heavy (that is, the batter becomes more like banana bread batter rather than pound cake batter), then add a bit more juice or water until it thins up a bit.
Stop the mixer and take out the bowl. Take the whites and dump them in – using a rubber or silicone spatula, fold the egg whites into the batter until you don’t see big clumps of egg white any longer. Then carefully pour the batter into the tube pan and set it into the oven.
DO NOT OPEN THE DOOR FOR AT LEAST AN HOUR. You can gaze longingly through the glass all you want, but do not open the door. After an hour, check the cake in your usual fashion ( I use the ‘press the top and see if it springs back method’ – you may use the fork of straw method..everything works – you just want a thoroughly baked cake.
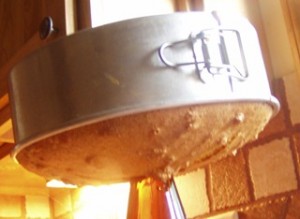 Take the cake out of the oven and put it over a wine bottle to cool. Leave it there for at least an hour.
While it is cooling, make the gelatin. You’ll need:
1 small box of fruit flavored gelatin.
1, 16 oz. bag of sliced frozen fruit (for this cake, I used sliced frozen strawberries).
Bring to a boil, 2.5 cups of water and pour over the gelatin in a bowl, stir to dissolve.
Open the bag of frozen fruit and dump it in and stir that around (this is akin to adding the cold water).
Put into the fridge until the gelatin is set but still jiggly.
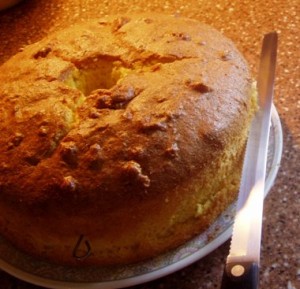 To create the surprise:
Take toothpicks or some other thin wire objects and place them around the top of the cake, one inch down from the top.
Take a large knife (I used my serrated slicer as you can see in the photograph) and carefully slice along the toothpicks and then you can lift off the 1″ cap of the cake. Put that on a plate and set aside. Take out the toothpicks or skewers (hey, I’ve been known to forget things too…).
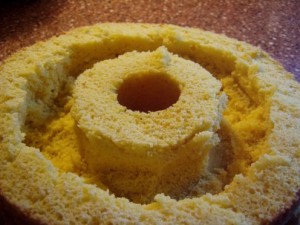 The next bit is a little tricky but not bad. Take your knife and make a vertical cut (don’t cut through the bottom of the cake) one inch from the center hole of the cake. Make another vertical cut just like it, one inch from the outside edge of the cake. Then take a fork and carefully take out chunks of cake from between those two cuts so that you end up with a cake that looks like the photograph.
Make sure your gelatin is, as I noted before, jiggly but mostly set. If not, then leave it in the fridge for another while until it is. If it IS, then spoon the gelatin and fruit into the canal in the cake. You should end up with something that looks like this. 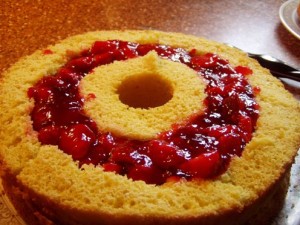
Carefully lift the top of the cake from the plate and put that on top. Put the entire deal into the fridge for at least an hour so that the gelatin will do its final setting up. You can serve this exactly the way it is, or frost with what comes next,or serve that at the side as the photo at the top suggests. The reason I did that is because I was taking this cake to a family dinner and it was a very very hot day and I did not want the whole thing to start melting in the car. The guests liked the cream just the way it was. Now, if you don’t want to use what I made and want to use something more traditional, then get a pint of heavy cream, beat it up until it’s stiff, add 2-4 tablespoons of sugar and frost with that or serve that on top. If you want to do this as a completely non-dairy item (we have folks with sensitivities in the fam, so I go non-dairy), then you can go out and get one of the non-dairy whips from the grocery store, or you can make this:
Coconut Cream
Ingredients:
1 can of regular coconut milk(don’t get the ‘light’ stuff)
1/4 cup of sugar.
How to:
Put the can of coconut milk in the freezer for one hour – this will make the coconut cream rise to the top of the can. Carefully open the can and spoon out the cream into your mixer bowl and mix that on high.
When it gets really puffy – then spoon by spoon, add sugar. Use this to put all over the cake or serve alongside.
Bon Appetit!!
