 I don’t know how some bloggers do it – seriously; everyone can’t be an expert in everything. I admit most of the time to not even being an expert in the stuff that I do, but sometimes it seems as if people just pick up whatever and are giving lessons over the internet.
When I want to do something I have never done before, I tend to ruminate. A lot. And if it involves machinery, pointy things, and the possibility of losing body parts, I take a long time to get into action. It’s just how I roll here, which is generally why if I can do it, I take a workshop to get started.
Unfortunately, woodworking is not one of those things that I can take a workshop in locally. As a matter of fact, the closest woodworking classes are over 3 hours away. Whatever happened to all the wood shop classes in junior and senior high schools? I guess they all got taken over with computer technology classes. So, I end up fiddling around a lot before I get started, to think through stuff.
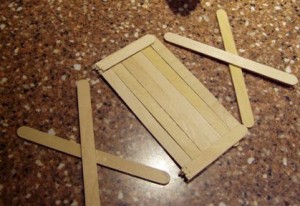
In the case of the ‘left over oak flooring table’, since I’m literally going into this blind, with little experience, no written up plan and just an idea, I decided to lay things out with popsicle sticks, to see if it even looked ok as a concept. So far, so good. At this point, I have determined a couple of things:
1) I don’t have enough wood to make the whole table. That is ok – once I figure out measurements (so far, the oak flooring part of the table top is going to be 16″x30″ and I know from other side tables in the house that it will be 24″ off the floor), I’ll figure out how much other wood I need. At the end, when I finish it, the table top will not match anything else and that is ok. I follow the ‘go big or go home’ philosophy – no way to make them match so I may as well make the difference into a design element.
2) I don’t think my original plan, to just attach all the pieces of flooring to one another with pocket screws, is going to work the way I thought it would. This flooring has a tongue on one side and a groove on the other and after a couple of tests, it looks as if I could definitely split the flooring. Now, the way you actually install wood flooring is that you put down a piece, tongue facing out, and using a pneumatic hammer, you put a special flooring nail through the tongue into a flat surface (these days, that is usually something like plywood). Then, you put the next piece of flooring in front of that, groove facing the tongue of the last piece, and using a mallet, you snug that right up with the tongue inside the groove and you nail that piece through it’s tongue, which is facing out. You are never nailing through the mail piece of flooring itself – just through the tongue, which is probably only about 15-20% as thick as the rest of the piece of flooring is. I’m playing around with the idea of using 1/2″ plywood as an under-surface for the flooring, but that is going to make the table top very…very heavy.
3) I have a couple of choices in terms of what sort of wood to use for the legs and the trim around the table top. One of them is NOT pine, which is a very very soft wood. I’m leaning toward maple at the moment, but I could be convinced otherwise.
Like I said, this is not a project that I can, with the best of intentions, knock out. When I read other people’s blogs where they show some amazing coffee table complete with drawers and say, “My husband and I knocked this out in a couple of hours,” I have no idea how they are doing this, seriously. At this rate, this little table will take me until Christmas.
