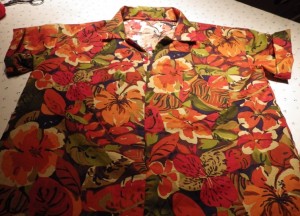
 When my Great Aunt Lily died, I inherited a suitcase filled with trims and notions from her. Inside it were bundles carefully done up with ribbon of metal-toothed zippers, and little bags of buttons. All sorts of buttons. It was also obvious from the condition of everything that these are not brand new stock that she’d bought and hoarded.
She’d removed them all from clothing that she and her sister had worn out.
This was a real head-scratcher for me until I asked my dad about it. Why would anyone save used zippers and buttons? He explained to me that all of those notions were expensive – and replacing broken zippers or lost buttons got expensive.
Do you remove zippers or buttons before you send clothing to the rag bag? Good question.
But buttons and zippers, for us home sewers, get expensive. So, one of the ways to reduce the expense of sewing your own is: sew clothing that doesn’t require a zipper or buttons to close.
Now, if you sew knits, depending on the pattern, you can definitely get away with no buttons or zippers, unless you are making a jacket.
But if you want a shirt. A woven fabric shirt. This can get dicey. So, I’m always on the look-out for patterns for woven fabric items which basically pull over the head. I got one last year when we were in London at the Victoria and Albert Museum, but I think you can find this company’s patterns in the US and other countries as well.
Here’s the pattern, called ‘The Factory Dress’: Merchant and Mills Its’ a multi-sized pattern (it’s in UK sizing, which for US sewers, means that if you take a US 12, then you need to use the size 14 lines). The thing that makes this dress really useful is that it has a separate bodice and skirt. (cue triumphant music here)
That means that I could take the bodice part, do a bit of magic on it and make a ‘pull-over my head shirt’.
Now, this pattern only has bust darts, so I had to do a little ‘split and add tissue’ in the front to deal with my rather luxuriant boobage, but other than that and lengthening the pattern to 27″ from shoulder to hem so that I’d be able to tuck it in once I was finished, that is all the change I had to do.
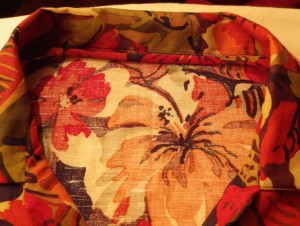
One other item, and this is my own particular bias: This pattern calls for a back neck facing, something which I hate. I hate them. If every grain of sand in the Sahara Desert had the word ‘hate’ printed on them, it would not equal 1/5th the amount of hate I have for back neck facings, which flip out, look yucky and are a pain in the neck. So, on the necks and collars of woven tops, I do a Hong Kong finish. Neat, tidy and.. no back neck facing. It ends up looking like this:  What I do is:
1) Make the collar and turn it right side out. Poke out the corners (and these are usually just little collars – not the righteous collar and neck band variety)
2) Zigzag across the bottom of the collar and pin it to the neck edge. Match all the notches and dots and what have you.
3) Baste the collar to the neck edge, pretty close (I use a 1/4″ seam)
4) Either use bias binding or self-fabric bias (1″ wide) as long as the collar edge is, plus 1″
5) Putting right side to right side, sew the boas along the collar edge/neck edge.
6) Fold down the unsewn edge and roll that over the collar edge/neck edge to completely encase it. Pin that down and sew it down. You can do this by hand or with machine.
7) Follow the directions for any front facings extending to the shoulder seam. Once you are done, you will see, Voila!, that the ends of your Hong Kong finished collar seam is neatly and tidily covered by the front facing. No back facing.
Anyone else have any tricks to save money on sewing clothing?
