 So, here I am, all full of myself because I have this brand new coat that I made ‘awwww by myself’ (don’t wanna be…all by…). A dog with two tails and all that.
And we’re in a rush to leave and I run out the door and twist around because I realize I have not done the little locking button thingy. And I turn around to shut the door and….
Snag. I’m caught. Big time. And I try to back myself out of it, and people are yelling from the car, etc. etc. And some bright-eyed person in the back of the car offers up, “Hey, Mom – you’ve got this big pull coming out of the back of your coat.”
Like, Aunt Toby didn’t know that. Every mom has eyes in the back of her head. I knew as soon as I felt I was caught that it was not going to ‘end well’ (as my dear old Mama used to say).
And for a moment, I again cursed the selection of the basketweave coating I’d gotten, but for another reason – unlike coating fabrics such as melton (which is sort of felted, actually), fabrics such as tweed, basketweave, boucle (think Chanel jackets – Coco was La Veritable Reine of loosely woven tweedy fabrics) are loosely woven enough that you can catch actual individual yarns in the weave and they can be pulled out.
And then what do you do?
Let’s look at two scenarios: The situation I had and the situation I’m glad I did not have but which I know how to deal with also.
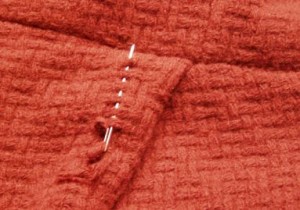
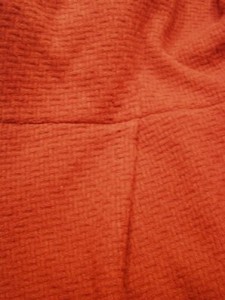
My situation was that I had a pull, a big loop that stuck out of the fabric of the coat. I have a coat that is completely finished and lined, so it’s not as if I could work from the inside out (like with a pull on a sweater, for example). I had to work from the outside. And here is what I did:
First, taking a big honkin’ yarn needle (you DO have a couple of these, right? They have huge eyes and are really useful for sewing together pieces of sweaters, pulling loops into the inside of the sweater when you get snags, doing large needlepoint, etc.
Second, find the broken end of the pull (sigh – with woven fabric, the chances of NOT having a broken end with a pull are pretty small).
 Taking your yarn needle, thread it with the broken end of the pull. The easiest way to get this into the eye of the needle is to fold over the fiber at the end, squeeze it really tight and push it through the eye(that’s one reason why you’ll need a yarn needle rather than just a ‘darning’ needle – get the biggest eye you can find).
Then, weave the point in and out in the place in the fabric where the yarn would have been if it had not been snagged and pulled out (over and under; match the weave of the yarns around your spot. With basket weave, it was pretty easy – if you are stuck with something like houndstooth or something more graphic, you will need to be a bit more clever, but at least you will have a model to work from so that the right colors end up in the right places). At the end, take the needle, bury the end of the yarn by putting the needle in the fabric and then at a little bit of distance away, pull it out. If there is any yarn still sticking out at that point, gently (!) pull the fabric of where you just did your re-weaving and the end should sink out of sight. If you are feeling a little bit nervous, then you can take a regular sewing needle with some thread that matches the fabric and carefully tack this yarn down along where you wove – little stitches – especially at the end. In general, this should be a good enough repair to carry you through.
 Scenario Two: The whole darned yarn gets pulled out. Ouch. Basically, you will be doing the same reweaving project, but you will definitely need to do the last step with the needle and matching thread. The other thing is this – let’s say that in the snagging and pulling, you end up with a piece of yarn that is not really long enough or thick enough to fill in the spot.
Now, you have to do a little bit of ‘harvesting’ out of the inside hem of the coat. If you have a solid color coat, then you have a very good chance of finding what you need. Un-do the coat lining at the back bottom and pin it up so that you can get a good look at the hem. Hopefully, they have just tacked it and not glued it down with some sort of fusible. Un-do the edge and unravel some fibers along that bottom edge as long as you will need. That’s your new yarn. Then, tack the bottom hem back into the coat; tack back the lining and use the fiber to do your reweaving. If the bottom hem of the coat has been fused down, then you may be able to tease out one of the fibers lower down in the hem (usually it’s not the whole hem which has been fused down) and use that. Now, if you had made your coat (another reason to do home sewing), then you’d probably have a piece of the coating left over in your storage (which I do and which I now will hold onto for dear life, believe me) that you can use for harvesting.
