
 The simple act of pushing a seed into some dirt, watering it and having it come up is still pretty much magic to me. Whether it’s from a plant where the seeds are so small that basically, you water the dirt first and then scatter them on top and hope for the best, or plain old bean seeds, the whole act of burying them in the dirt and then their coming up is really an unceasing source of rather childlike joy to me.
Not that it always works out. If the soil is too wet and cold, they can just rot. Or, as in the case of my tomatoes and peppers this year the first time around, they can basically cook if you use a heating mat and don’t use the rack to separate the bottoms of the sprouting flats from the heat source (and HOW long have I been doing this???? Hmmm?). So, there is still a measure of magic to it.
And once they are up, you want to move them to something bigger, which is what I did with the second round of tomatoes this week. And although many of you readers will be saying to yourselves, “Oh, I can skip this; I’ve been doing this for ages,” forgive me. I recently was asked by someone these same questions and it hit me that there are a lot of people out there who have NOT been doing this for ages and would really like to know how it gets done.
So. You’ve planted your seeds into something – a pot, a salad container, whatever – even the ground. And they are up and the leaves have unfurled and what do you do now?
 OK. I know that most gardening books will say, “Wait until the second set of leaves have emerged and then hold the seedling by the first set of leaves.” I’m going to break that rule – I always do because if I waited for those second set of leaves, the roots would be all tangled up together in the dirt and I’d injure them in trying to divide things up.
First, you will need some container – at least 4″ deep – 6″ is better – and put your potting mix into that (make sure it does not have too much peat in it; if you think that it is too light and fluffy, go to the home and garden store and get some vermiculite to mix in. A proportion of 1 to 4 (vermiculite 1/potting mix 4) is about right. Water it so that the whole mix is good and damp.
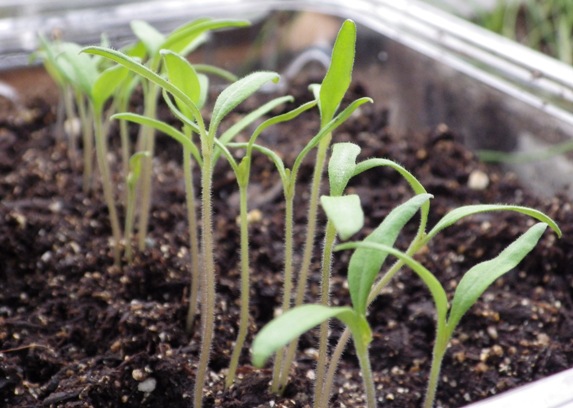
So, as soon as the seedlings are up and the leaves are fully unfurled, take something like an old knife or the wooden stick from a frozen ice pop of some sort and gently…gently…gently, lift up a section of the seedlings. Not too many.
 Take your knife or frozen pop stick and make a good deep hole in the dirt and picking up a seedling by one of the leaves, slide the root/roots down into the hole and gently pull soil into the hole and around the stem. DO NOT HOLD THE STEM. All of the action here is to just hold the seedling upright and move soil. Use the knife or your fingers to gently firm the soil around the seedling. Just press down a little bit to make sure the roots are in contact with the moist soil. Make sure to leave a lot of room between the seedlings.
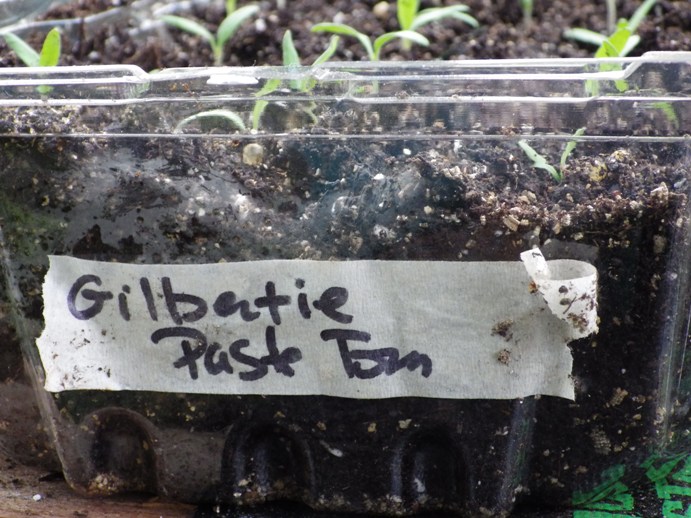 Finally, and frankly, your old Aunty has to remind herself to do this every single time, transfer the label from the original container of seedlings to the new container of seedlings. If you grow multiple varieties of any one thing, it becomes very easy to lose labels, forget to move the label to the new container and so on so that by the time you end up putting them outside into the ground, you may have mixed up plants and not know what is now being planted where. So, a word to the wise and so on.
Once these seedlings get so big that their roots are starting to fill in the bottom of the container, it’s time to start moving them into individual containers and I like 4″ peat pots. These are something which you can plant right out into the garden when it’s time to do that. Just be reminded to tear down the sides and bottom so that the roots will stretch out. Just make sure to keep the seedlings well watered – especially during the period just before you are going to put them out, when you have them outside in a warm sunny place to ‘harden off’. If it gets breezy, the peat pots can lose a lot of moisture and the plants will wilt. So, keep them watered.
Another big of ‘seedy goodness’ is a project that I’ve been doing this year on apples (the photo at the top is of apple seeds which have sprouted). Now, standard commercial apples are usually sprayed with a chemical which prevents the seeds from sprouting, but this year, as I’ve been cutting open apples to eat them, I’ve found the occasional seed which has already sprouted. Would they grow?
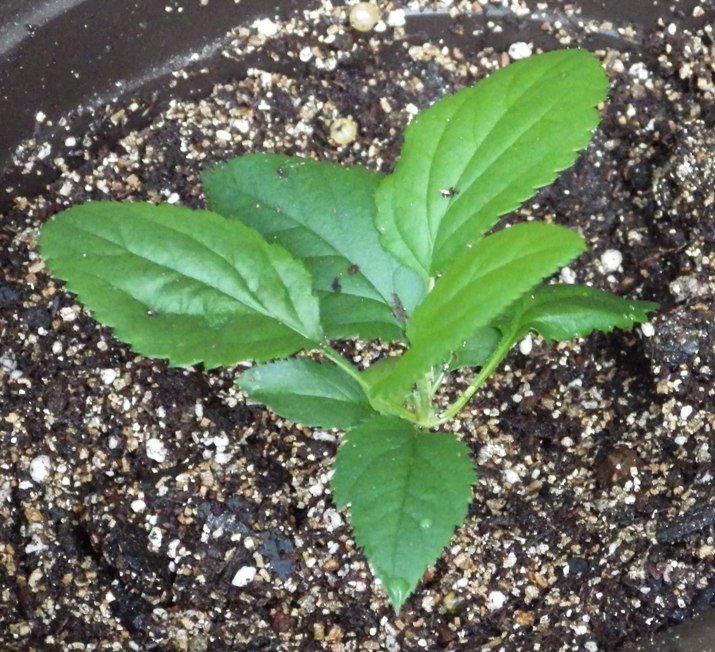 Well, by gum, they do. This is the first seed I found in the winter. I literally just stuck it into a pot and kept it on a table in a sunny spot in our rather cool living room this winter. We will plant this outside later this spring.
What is it going to be?
Well, it’s going to be an apple tree – a regular, tall apple tree. You see, the standard size of apple trees in the wild is 20-30 feet and more. The apple trees that you see in modern orchards have been grafted onto rootstocks which keep the tree short. There are semi-dwarf rootstocks, which produce a tree which is 12-15 feet high and dwarf rootstocks which produce trees which are 6-10 feet high, all of which makes picking the apples a lot easier and safer than working at the top of a ladder on a 20′ tree. Now, what we can also do with these trees as they grow is to take cuttings and grafting those cuttings onto limbs of dwarf and semi-dwarf apple trees so that we can get these apples at a height which is easier for us. OR, we can go out on the internet and order dwarfing rootstocks and graft them onto those rootstocks and produce dward and semi-dwarf versions of these apple trees. Neat. So, look out for sprouted apple seeds – you can have your own apple trees!
Finally, an update. Readers might recall several months ago that the DH and I were provided with some rather eye-popping seeds. 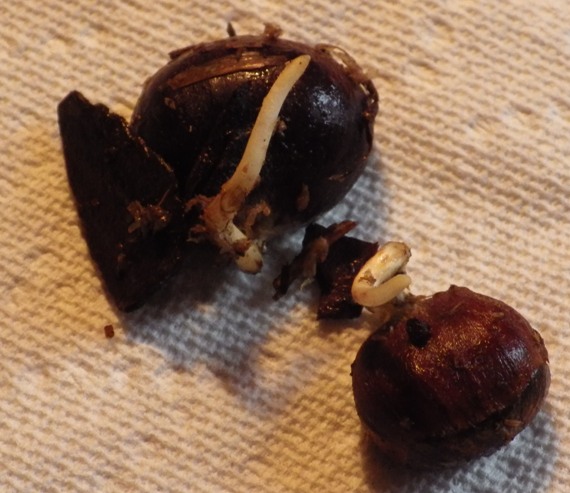 These are American chestnuts which the owner sprouted to provide volunteers who are interested in growing trees. it’s been a very interesting project so far and seemed to literally take forever to see any action in the 12 pots we planted. But I can say that we have had success – 100% success.
 We have 12 of these out in the greenhouse right now and when the weather warms up at the end of the month, we will be planting these outside as well.
On a sad note, however, we have not been able to really get out into the garden at all. It’s been a cold spring and frankly this week, it’s been raining every day (weather people are blaming this on something called ‘an Omega block’) and supposedly, it will be almost as bad for the rest of the month. Oh. Joy.
Well, we have June to look forward to.
