
 At this point in the year – end of February – no matter how sunny your disposition, we can look at the calendar here at Chez Siberia and count the weeks until genuine spring. At best, we will have 5 weeks to go; at worst, it will be 8. And the weather folks have been mumbling about a nasty Northeaster in our March future.
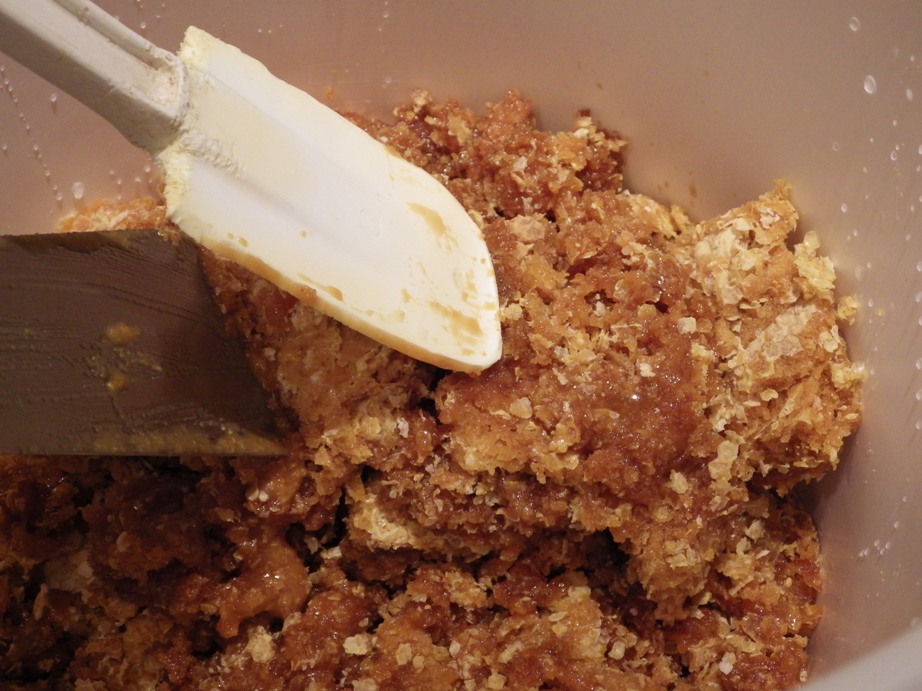
Yum. Yum.
So, to occupy ourselves, we are doing inside work to get ready. It’s too early for me to start seeds for plants, since we can’t put out tomatoes and peppers until late May/early June (you do know we call our place ‘Chez Siberia’ right?), but there are plenty of other tasks. We have (as your can see from the picture at the top), beeswax that needs to be cleaned up and processed.
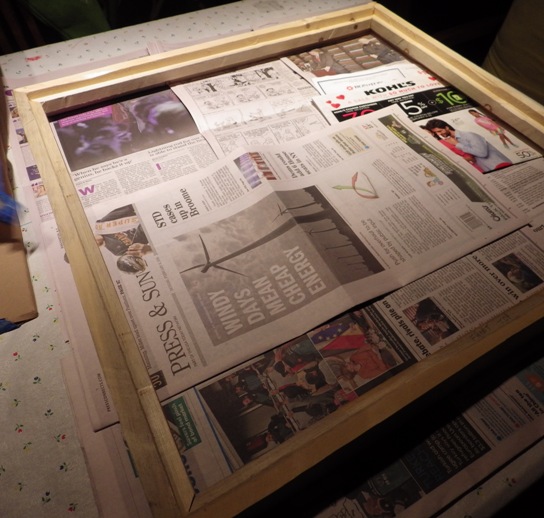
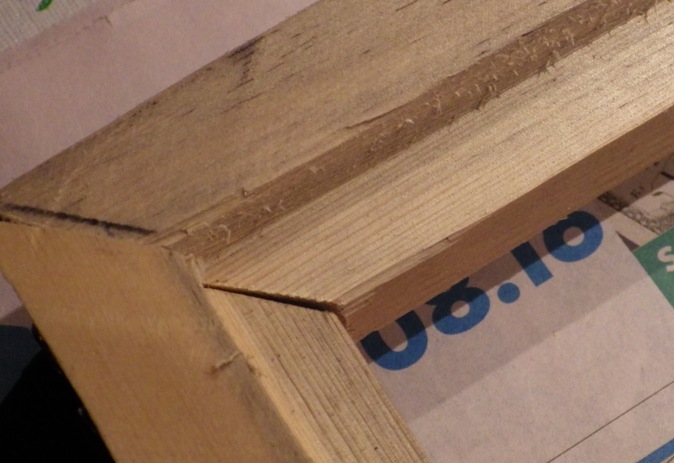
As discussed before, the DH is bringing in bees again, and we’ve been repairing and rehabilitating the bee hive bodies and other equipment. Another project is to build a solar wax melter, which is basically a wood box where the top is a window. Now, from an efficiency standpoint, we could have scrounged around and found an old window (goodness knows we have enough of them), but we didn’t have one of an appropriate size, so the DH decided to build his own. Basically, all that is required is to build a frame and then use a router to carve out a ledge on both sides of the window so that we can put in appropriately-sized pieces of glass.
 Now, this process would have been a lot smoother if the DH had started with clamping on a piece of wood on the outside to act as a guide for the router (a ‘jig’ if you will), and in the end, he actually did that, but the ledges, again, were not perfect, but definitely useable.
 To put glass in windows (and if you have old leaky windows or a broken window that needs glass replacement, then the whole process works the same way), you need some supplies and a bit of courage:
Appropriately sized piece(s) of glass – take the window with you to the hardware store. The people there will know how to correctly measure for the glass.
Glass caulking (or glass putty; don’t ask me what the difference is – this is a pretty old-fashioned term and the stuff used to come in a can). If you buy a tube, you will need a caulking gun (which frankly you’d need for other caulking projects for weatherizing, bathroom work and so on, so if you don’t have one, make the investment). If you are using putty in a can, then you will need (oddly enough) a . Yes there are the ones which are about 4″ across – those are useful for taking off wall paper and doing work on wallboard compound, but are too big for the job here.
Glass Points: There are several types, but get the ones that look like this – trying to put triangular glazier’s points into a window frame is a lot less successful for someone who has not done it before.
A set of Channel Locks or pliers. Do NOT try to use needle-nosed pliers; you need something with a jaw big enough for one end of the plier jaw to go against the little ridges that horizontally stick out, and the other end to hook over the outside of the frame.
Like so: 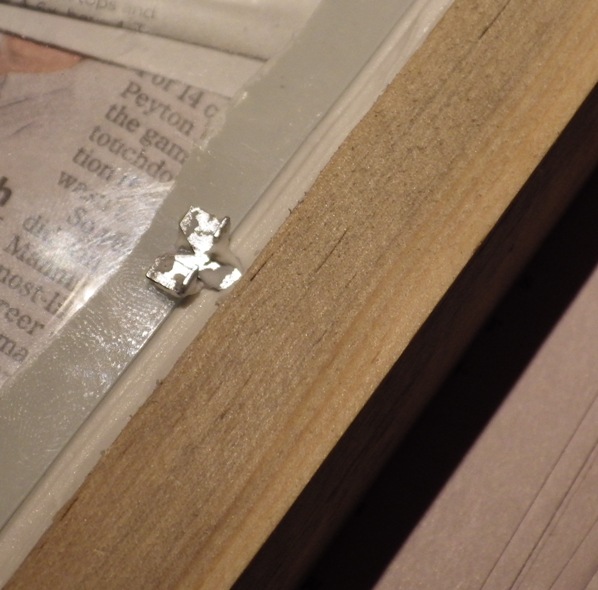
Here is the process in order of performance up to the point of caulking:
Old window that needs to be re-glazed:
Clean up the window and carefully (wear gloves) scrape out the old dried putty with a putty knife. Take your pliers and pull out the old glazing points. Using gloves and paper towels, removed the old glass and put into a paper bag for disposal. Clean out the ledge where the glass was installed and do any repairs (wood putty, sanding, etc.) that are needed.
New window frame:
Check frame for any cracks or other damage that need repair – use wood glue.
Caulking/Puttying the frame: Put down newspapers or other protective material on some sort of support – a table, saw horses or so on. See the ledge in the photo? Take the tube of caulk and put it into the caulking gun. Take a craft knife or heavy scissors and cut off the tip at an angle. Squeeze the gun’s trigger until caulk starts to come out and holding the gun at an angle to the ledge (that is, the ledge would be horizontal and the gun’s tip will be at about 30-45 degrees to that), squeeze a line of caulk along one side from corner to corner. Go to the next side and do the same and so on until you have all four ledges with a line of caulk. Cover the whole ledge from inside to outside. If anything flows over, use your putty knife to scrape off the excess.
If you are using putty in a can, you might have to mix it a bit when you open the can up. Also, once the can is open, the stuff starts to dry out right away, so, make sure you have 30-45 min. of totally uninterrupted time. No kids. No dogs. No “Oh, I forgot; I’ve got to put something on the stove.” Once this process starts, you need to do it to completion so that the putty doesn’t dry out on you before you get the glass installed. To use putty in the can, open the can and using your putty knife, pull out a glob of the putty and with the knife at an angle to the ledge (the knife will be on the inside of the window frame, against the ledge) push putty into/onto the ledge. You basically want a triangular surface of putty all along the ledge, from corner to corner, all the way around the inside ledge. Scrape off any putty that is hanging over the inside ledge. Close up the can.
Insert the glass: This is the scary part. Use your gloves. Seriously. First, make sure you are holding the glass with the appropriately measured edge facing the right ledge. This is only a big deal if you have a window that doesn’t have a square piece of glass in it, but it is important because once you get the glass against the caulking, it really sticks.
Holding the glass in both hands, line up the top edge of the glass to the top edge of the ledge. Tip the bottom edge (the edge closest to your tummy) UP and slide the top edge into the corner produced by the edge and the rest of the frame. Holding onto the glass (for dear life, believe me), check the corners of the glass to make sure they are lined up with the inside corners of the frame and oh…so…carefully… moving your gloved hands down the piece of glass to the bottom edge, support the piece of glass as it moves down into the bottom ledge of the frame. It should be centered, but if it’s a little off, you can put your hand UNDER the frame and using your fingers, slide the glass in whatever direction it requires to get it as centered on the ledge as possible.
Using your fingers (you can now take the gloves off; these are picking little buggers), push the sharp point of the glazier’s points into the frame. They will be ON TOP of the glass and the ears sticking up need to end up OVER the edge of the glass (the points are really what is holding the glass in the frame). Put one in the middle of the frame edge, then two about an inch inside the corner and then one every 4″ from then on. Using your channel locks, put the jaw against the little wings sticking up and the other side of the jaw on the outside of the frame and gently squeeze the pliers as far as you can. This will force the sharp end of the glazier point into the wood of the frame and will not break the glass. Again – squeeze gently. Take your time. 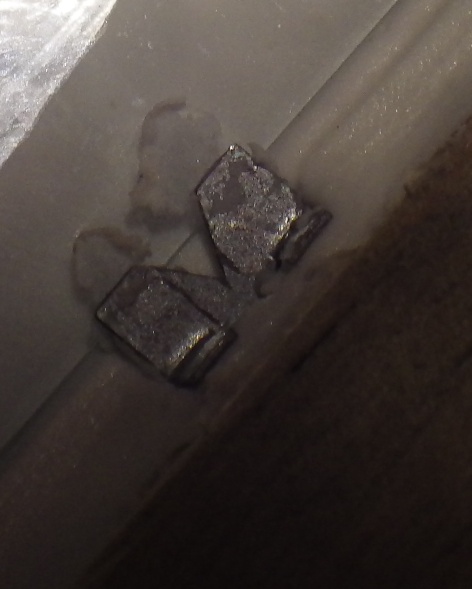 Once you get one side done, move to the opposite side of the window and do that side. Then do the other two sides of the window. Let dry overnight and flip. Use your putty knife to scrape out anything that squeezed out on the inside of the window. If you are putting in double glazing, follow the same process with this side and install the glass there.
Allow to dry, scrape off any excess and paint the frame.
In our case, the DH will now put on this window (double glazed) with hinges on the solar wax melter.
In the meantime, we have wax that needs, desperately to be cleaned up.
When beekeepers want to extract the wax from the frames in the hives, they use a knife (a regular knife or an electric one) to open up the cells with the honey. This is called ‘uncapping’ and when you do that, you end up with a lot of little bits of wax that have honey all over them. You need to get the honey off and then clean up the wax.
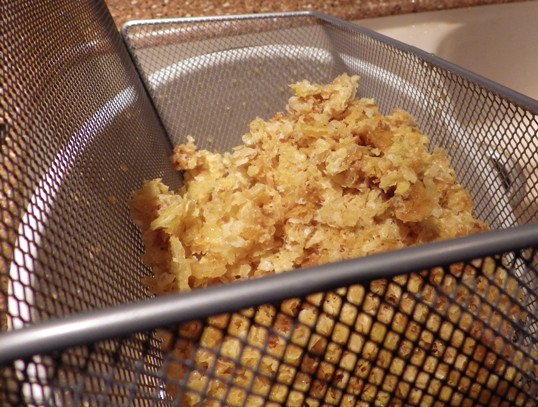 We take the cappings and other wax that the DH has removed when he’s been working with the bees (bees will upholster the insides of the hives with wax and a sticky substance called propolis and beekeepers scrape that off so that they can unstick the frames, hold them up and take a look at what is going on) and wash it.
And wash it.
And wash it.
Right now, because we haven’t finished the solar wax melter, we are using an old crock pot to melt down the wax. Now, to be truthful, this wax, although it smells wonderful, is…mmm…not clean. You end up with all sorts of stuff that the workers have not hauled out of the hive: odd bits of things, dead bees, and so on. So, to really get it clean, we need to melt it over water to start the process of allowing anything that is NOT wax to float down and get caught in the water so that we can make clean wax.
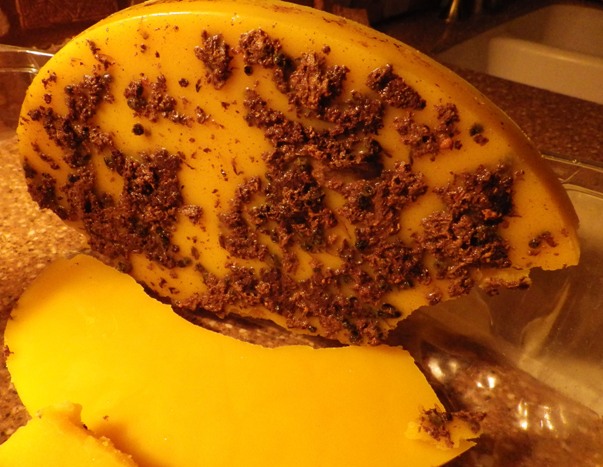 This is the first time through the melting over water. The wax looks really lovely – yellow. But what you are seeing here is the underside which has propolis, and other stuff that no one wants. So we will get rid of the water and carefully scrape this stuff off the bottom, fill up the crock pot with clean water, melt the wax, allow it to cool and keep cleaning the wax in this way until we flip over the wax cake and there is nothing clinging to the bottom. Clean wax.
How are you getting ready for spring?
