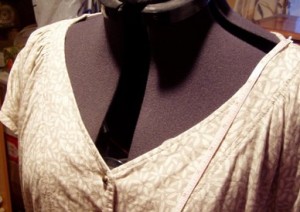
 I think all of us who are female have had this experience: You see a dress or a top in a shop and fall in love with it (oh, ok, so you don’t fall in love with it, but it’s better than a poke in the eye with a sharp stick, clothing-wise) and the price is right and you try it on and it fits.
Except for one thing. The opening in the front, is, shall we say, a bit too far ‘south’ for your comfort. Now, part of the issue is that the pattern drafting software that seemingly all designers and manufacturers use has some bit of code in it that says (as only code can) something like, “As the size of the garment increases, everything gets bigger, wider, and longer.” I’m not sure men’s clothing design works the same way, but in women’s clothing, this seems to be the rule. And for those of us who are not built exactly the same way as the fit models or the fit algorithm in the software are, we have, shall we say, issues. For those of us who are short, those issues are multiplied because as we get bigger around, we do not get longer or taller and our arms do not get longer. So, we end up buying clothing to fit the largest measurement we’ve got (which usually is the bust measurement), and then the neckline is so far down the we’re displaying all sorts of things that we’d frankly rather keep more discrete.
And even if we’ve rationalized to ourselves that we’ll do things like wear cami’s underneath and all of that, it never quite works the way we think because — well, we have the same issues with cami’s that we do with everything else. And the dress or top sits in the closet, unworn, which means that it’s the most expensive item you’ve got. And every time we go through the closet, we look at that item (or items) and we sigh and we finally acknowledge that we’re not going to wear the item and it goes into the bag for the charity and we feel bad that we wasted money.
Because wasting money is one of the great final sins, isn’t it?
So, your Aunt Toby, last summer, at the ‘end of the end of the end of the season’ sale, bought the dress shown in the top photo. Linen. A terrific price. As a matter of fact, I bought two of them – the other one is navy linen. And I too deluded myself (never let it be said that your Aunty doesn’t have the capacity for delusion – I do…oh, yes, I do) about wearing them with a white cami and never did. So far, these are very very expensive dresses but I became determined to deal with it.
Since I got these dresses because I wanted something light and cool for the summer, wearing a top with more coverage underneath was not going to be the answer. I needed something that would fit in and ‘bridge the gap’ without adding a whole other garment underneath.
Voila: dicky? Not sure that is exactly the correct name, but still.
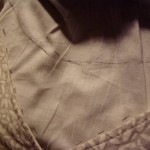 First, get a piece of light-colored plain weave fabric (I’m using a piece of muslin here) that is wider and longer than the opening and pin that inside the opening. If you have a dress form, that makes this a bit easier but if not, lay the dress or top on a table or on the floor, making sure it’s all spread out. Just lay the piece of fabric underneath the edge of the opening and on one side of the opening, pin the fabric at the shoulders and around that side of the opening. Then, smooth the fabric over to the other side of the opening so that you don’t have any loose fabric and again, pin the edges of the fabric underneath the edge of the opening of the garment and pin to the shoulders and down the sides of the garment opening. Than smooth the fabric down and pin the bottom underneath the bottom of the opening. Now, take something that won’t leak through, like a pencil, and on the fabric, mark the inside edges of the opening all the way around, and pay special attention to the shoulder seam area. Also with your pencil, sketch in where you’d like the new neckline on the fabric.
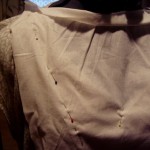 Second, Take off the fabric and flip it over to the unmarked side. Line up the line you made on the fabric with the edges of the opening of the garment and pin. Then look for any seams in the front and pin there also. If you have seams and have pinned there, use your pencil and mark on the fabric where you have the pins. If you don’t have any seams in the garment in the front, we’ll take care of that later.
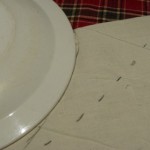 Third, undo the pins and take the fabric off. Using a ruler or some other sort of straight edge, connect up the straight lines on your fabric. Using a French curve (or, if you don’t use a plate as I’m using in the photo) to get your lines set and true-up the new neckline curve on the fabric. Then, take a ruler or measuring tape and give yourself a 1/2″ seam allowance around all sides. If you didn’t have any seams in the bodice of the garment, you should give yourself a 1″ seam allowance from the original pencil lines you drew at the garment edges.
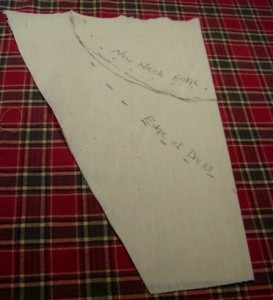 Using the new seam allowance lines, cut out your fabric. Then fold it in half vertically and press. Using the pressing line as your guide, cut along the pressing line. This is your new pattern for a dicky to bridge the gap.
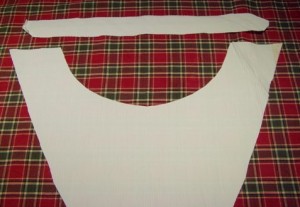 Using your fabric of choice (in my case, I had some white and white striped shirting fabric, fold along the grain and put the center edge on the fold and cut out. At the same time, fold the rest of the fabric on the bias and cut out a strip 1″ wide and as long as the new neckline edge on your dicky.
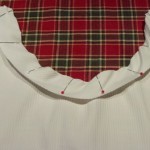 Pin the bias strip along the neckline and sew a narrow seam along the edge. Fold the unsewn edge toward the neckline and press. Then flip the whole thing over. Take the edge of the bias strip and fold that over 1/4″, press and fold again. Pin this to the inside of the neckline edge – this will cover the the seam you just made. Hand-sew this down and press again for a neat neckline finish. Then press down the other edges of the dicky narrowly to the wrong side, and fold over again and press. Sew down.
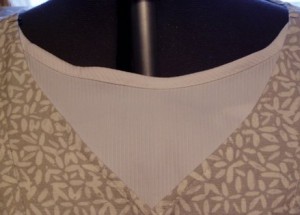 You can now ‘install’ this into the garment by sewing this piece in permanently or put on snaps (and put the other half of the snaps on the inside edge (or on seams on the bodice of the dress) at the shoulder seams and a couple of other spots, or sew one side permanently and put snaps on the other side. This way, you can take the dicky out and wash it when you would like and use it in other garments that have the same neckline.
There you go.
