 Once upon a time, your Aunt Toby did a little thing on replacing zippers in blue jeans. This is an entirely different kettle of halupkis (as we say here at Chez Siberia): A separating zipper in a jacket. (cue the scary music)
What makes this zipper different than a jeans zipper? Well, the biggest difference is this: this is a separating zipper. Now there are a couple of different types of separating zips for the fronts of jackets: The garden variety one with one zipper pull which once you zip it up, the coat is closed at the bottom, and the super-duper one with two pulls with the magical ability to zip in both directions so that you can leave the bottom open a bit to help with bending, walking, shoveling snow and so on. Today’s story, my little muffintops, is about the plain old garden variety.
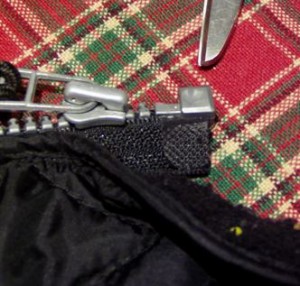
To be blunt, although zippers have been popularized since 1917 (although the idea was first patented in 1852, it was not improved and marketed until 1917 as a device for fastening up shoes), it has actually always had a couple of weaknesses as a fastening device. The major one and the one which puts wearers in the annoying position of ending up with the zipper pull in their hands and not closing up the zipper, are the stops, which are located at the top of the zipper and also at the bottom if it is a separating zipper. See the photo at the top. This is a zipper stop at the bottom of a separating zipper. For some reason – and I suppose it is because this is the point which takes the most abuse in a separating zipper, these tend to come loose, due to wear on the twill tape of the zipper itself at that point, and then the stop itself separates and falls off and the next time the wearer zips the jacket, boom – the zipper pull comes off in the person’s hand and there they are, traveling to the dry cleaners to get a replacement.
Because one of the unfortunate truths of life (along with death and taxes) is this: You cannot repair a zipper stop at the bottom of a separating zipper. As we used to say in my French class, lo these many years ago when your Aunt Toby was slapping clothes with rocks along the Seine, “Il ne marche pas.” Which actually means – Forget it.
We are faced, therefore, with a complete replacement, which on the front of a jacket has a couple of details to which we need to pay attention in order to end up with everything looking the way we want it to. When your Aunty gets to those points, I will make it obvious that these are important by noting something such as ‘Remember this one’ or something like that.
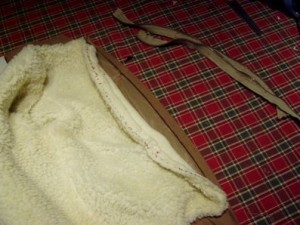 Step One: Remove the old zipper. You’ll want a small set of scissors with sharp points. A single-edged razor blade or a seam ripper will work too but I like little scissors. There will probably be more than one line of stitching, so undo them all and take out the zipper. Set the old zipper aside for use as trim – designers have been using them as piping on pockets and so on for a couple of years. Worth it to have some old zips around for that purpose, metal ones especially. Once you get this out, measure the zipper and mark that number down to take with you to the shop to buy a zipper. Now, with any luck, you will find a zipper that is the same size, but many times you are faced with choosing a zipper which is either smaller than the one you just took out or one slightly larger. Trust me on this one: Buy the zipper that is the one size larger; you can always shorter the zipper at the top and I will give you notes on that later. If you try to put in a zipper that is smaller than the jacket front, you will end up with several inches of unzipped jacket, which always looks odd and doesn’t keep the wearer warm. Just spring for the larger zip. Also buy appropriate thread. Now, this is going to depend on the garment itself; in this one, I chose thread to match the other top-stitching on the garment which is NOT the same color as the garment itself. If you have the choice between matching the garment and matching the top-stitching, match the top-stitching.
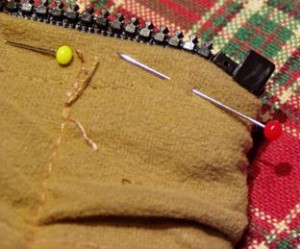 Step Two: Setting the right hand side of the zipper.
The right hand side of a separating zipper is the side that has the stop at the bottom, a stop at the top, and the zipper pull on it. Now, when you look at it face on, that part is on your left, but when you put it into the jacket, you are putting it into the side of the jacket that would be on the right hand side of the wearer’s body. Separate the two halves by unzipping the zipper. (oh yes…this next bit is an important item, so take note, please) NOW, STARTING FROM THE BOTTOM (SEE PHOTO), pin the edge of the zipper stop as far as it will go into the bottom edge of the jacket. The stop itself will not be right down at the bottom – you noticed that, I’m sure, and that is because below the stop on the zipper is this plasticized half an inch which is actually rather annoying to have to sew or even put pins through. So, put the stop as far down as it will go and start pinning that half of the zipper up the jacket edge right up to the top, with the jacket folded edge almost to the edge of the teeth.
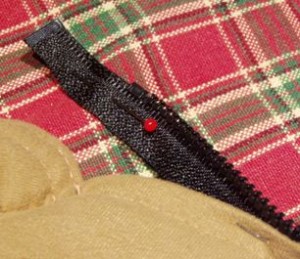 Step Three: When you get close to the top, you are faced with another issue: If you have a zipper that is longer than the jacket front, you have to deal with the extra length. You can remove the extra teeth with a set of pliers, which leaves you with a piece of twill tape that you can fold to the back as in the photo and sew down, to be covered by the jacket front and the lining. However (and this is another Point to Remember), YOU WILL NEED TO CREATE A NEW STOP AT THE TOP. You don’t have to do this right now, but before the end, we’ll do that so that when you zip the jacket up, the zipper pull will stop at the top instead of flying off in your hand.
Step Four: Hand baste through the jacket front and the zipper, GOING FROM BOTTOM TO TOP. Then, using a sewing machine and a zipper foot. If you do not have a sewing machine, use the smallest hand stitches you know how to use as close to the jacket edge as you can and then do another line of stitching right next to it using the thread you chose.
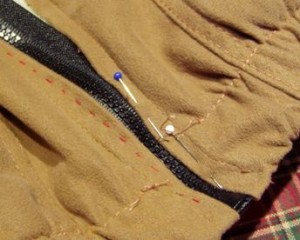 Step Five: (This is an important bit)PUT THE OTHER HALF OF THE ZIPPER TOGETHER WITH THE PART YOU JUST SEWED IN AND ZIP IT UP SO THAT THE ZIPPER IS CLOSED. Then, jam the bottom of the zipper as far as it will go into the bottom edge of the jacket on the free side, pin the jacket edge and the zipper tape together and start working your way up. Before you get half way up the jacket edge, look to see if you have any design features on both halves of the front of the jacket that you need to match. On this jacket, there is a yoke seam, so I knew I knew I wanted to make those match up horizontally. So I lined those two halves up, pinned the jacket front there to the zipper and then worked my way back down to where I stopped. Then I went back to the yoke seam and pinned the rest of the zipper up to the collar and did exactly the same thing with the zipper tape to bend it over and hide it. Then I hand basted it and sewing bottom to top, ran it through my sewing machine using my zipper foot, being careful to keep the lining away from the zipper so that I could tack that down by hand afterwards.
Step Six: And just because I did not want to forget to do this, I hand sewed stops at the tops of the zipper tape where it met the collar. the way I did this was to double up thread in a needle and hand sewed that spot just above the last tooth on the zipper, on both sides, over and over until I created this ‘lump’ there to act as a stop. Then I tied the threads off and hid them underneath.
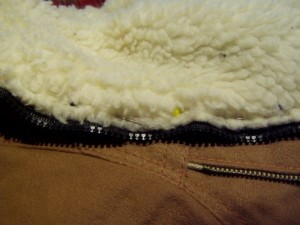 Step Seven: Tacking down the lining. Now, the manufacturer did this all in one pass for the second line of stitching for the zipper halves but I’d rather have more control over where the lining actually hits on the zipper tape, so I pinned the fake shearling lining close to the tape and hand-sewed (using a backstitch) the lining to the tape, bottom to top.
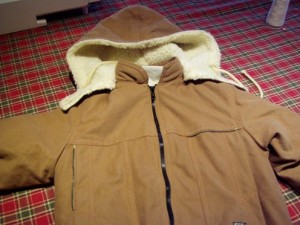 Step Eight: Testing. Carefully put the zipper together at the bottom and slowly zip it up to the top. Don’t jerk it – test the waters with those stops you made at the top to make sure that they are thick enough and seated well enough that they are not going to allow the person wearing the jacket to forcefully zip it up and end up with the zipper pull in their hands. If they don’t seem big enough lumps to stop the pull adequately, put some more thread in there – just keep oversewing it until they are big enough.
There you go. You just saved a jacket from the rag pile. Good job.

Thanks so much for this. I have a great winter jacket that I love and the zipper sooooo needs to be repaired.