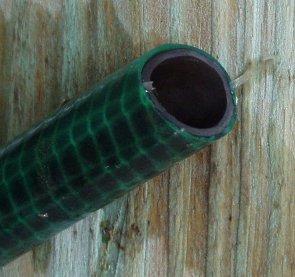
 Winter is really hard on garden equipment, especially if you (ahem, like we did) leave things out. It is especially hard on hoses because there is always some water in some bend in the hose and then it freezes and expands and weakens the hose. UV rays are also tough on hoses too, so you combine that little weakness in the hose with UV and heat and voila! A leaky hose. Now, replacing a hose is expensive and actually rather wasteful. I don’t even want to think about the millions of leaky hoses that have been thrown into the garbage and trucked up to the country’s landfills. Your problem with the hose is NOT the hose (no, this is not Zen of hose fixing..); your problem is the place in the hose where the leak is.
Your job, Mr. Phelps, is to remove the leak, or rather, to remove the place in the hose where the leak IS.
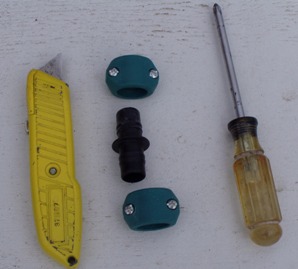
 To do that, you need about 10 minutes, a couple of basic tools and a hose mending kit that has, on its label the same diameter measurement as your hose (if you have a 1/2″ hose, get a 1/2″ hose mending kit and so on): A Phillips head screw driver, a box cutter or or utility knife with a good sharp blade, and a mending kit which consists of two screw downs and a coupler unit. There are actually other, more specific versions of the kit, with a male end or a female end, if you are trying to produce a hose which will screw into another hose, but that is a story for another time. These kits can be found at any hardware store or home and garden center. In our case, as you can see, we already had a leak in this hose that we fixed before — that’s why you see the couplers together in the top photo – ignore that for the moment and pretend all you are seeing is the leak coming out of that hose.
 Step one: Remove the leak
You’re going to want something to cut the hose ON (rather than your leg or something like that – trust me on this, a utility knife under enough pressure to cut a hose will go into your leg and you do NOT want to spend your Memorial Day weekend time sitting in a hospital emergency room having to explain why you have a big gash in your thigh). We’re using a 2×4 here.
 Line up the hose (you did turn the water off, right?) and holding the knife so that the blade is at 90-degrees to the hose, make a forceful straight cut down into the hose. Your goal is to have a cut that is relatively smooth but also with edges that are straight so that when you couple it all up, the edges come together smoothly. So, make your second cut to remove the other side of the leaky part of the hose. You will now have a piece of hose which actually has other uses (like tie downs for bushes and trees and so on – another story for another time). Put that aside.
Step Two: Putting the hose pieces back together
First: Take one piece of hose in your right hand and slip one of the screw on couplers onto it (in our illustration, they are green) and let that slip down the hose.
Second: Take the other piece of hose and slip one of the screw on couples onto THAT one and let that slip down the hose.
 Third: Take the first piece of hose and taking the black coupler unit, screw that into the cut end of the hose. You will probably have to twist your hands around back and forth to get it in. Be patient. It’s going to be tight and you want that. Your goal here is to get the cut end of the hose to meet the black raised ring in the middle (see photo). Now, slide up the green screw on coupler that is already on that piece of hose, back up the hose toward the cut end and line it up with that black raised ring, too (see photos) and using your screw driver, tighten the screws on it so that it is good and tight.
Fourth: Take the other piece of hose and screw the cut end of THAT piece of hose onto the other, non-occupied end of the black coupler unit, making sure you twist your hands around so that again, these cut ends also butt right up to the black raised ring in the middle. Now slide up the other green screw on couple that you already put on this piece of hose, toward the cut end, line it up with the black raised ring too and lining that coupler up so that it matches the first one (see photos), tighten those screws up nice and tight. 
Voila! Hose just about good as new.


