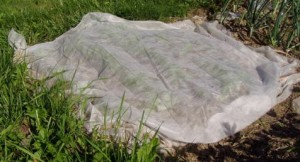
 This year has been the Year of the Pudgy Squirrels, but it has also been the Year of the Bunny. Oh, do we have bunnies. And they are extremely fast on their little furry feets, too. I set out kohlrabi, cauliflower and broccoli plants and snip, snip. (more…)
gardening
We’ve always done it this way… or not.
Rooting Succulents
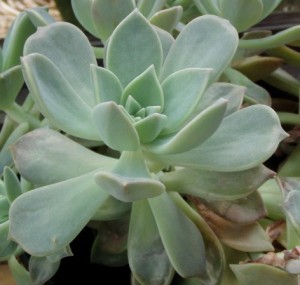 Plants are really quite astonishing things – over time, they have developed all sorts of rather clever and interesting strategies for reproduction which makes our little mammal dance seem rather tame by comparison:
— Ferns, which reproduce through spores (with the help of droplets of water).
— Plants which grow their own little plantlets, which then break off and root themselves when they get to the ground.
— Plants which have flowers with both male and female parts and allow anything from insects to bats to move the boy stuff onto the girl stuff. Plants which have flowers which if they get hit or jostled become fertilized. And then they form seeds which fall to the ground, sprout and off you go. (more…)
Butterfly Plantation
 If you are the sort of person (oh, and hi again – I know I’ve been away for a while… great to be back – how are y’all? I’m fine) who at the seed rack just cannot resist those packets (or cans, or bags) of seeds labeled ‘wild flower meadow’ or ‘butterfly garden’ or that sort of thing, I’m here to tell you something important:
The only way those ‘by the pound’ things work is if you have at your disposal a tractor, plow, and a big tank of some sort of really strong, nasty herbicide. Basically you have to kill off everything that is living in the spot you want to plant now, which might take several applications of herbicide, and then break up the soil with the tractor and plow and broadcast the seeds. Just throwing out the seeds won’t work – the native grasses and weeds will out compete the seeds.
Not even discussing the environmental and health impacts of using those herbicides, you’re wasting money.
So, if we want to make more food for birds, butterflies and so on, what is the best way to go?
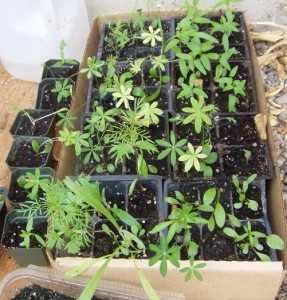
Your Aunty goes with this: Buy the smallest packet of the mixed wildflowers you can get (and there are many available, both on the seed racks and over the internet) and start them just the way you’d start any other seeds for your garden – I use the plastic salad containers from the grocery store because they come with lids and that makes keeping the moisture in easier, but whatever works for you. Once they are up and into the second leaves, I transplant them into four-packs or six-packs to really get going.
Start the seeds and when the plants are really plants, then transplant them to your garden, or to a border area.
I know some of you are saying to yourselves, “This seems like a lot of work.” It’s not really but the thing is this – if I’m going to spend my money on seeds, I want to give them the best chance at surviving and competing with the other plants out there. The best way to do that is to make sure they are already plants when I put them out in the garden. These mixes are usually made up of perennials and annuals and once the perennials are established – they have a pretty good shot at surviving through the winter and coming back next year.
A leg up, if you will, over the other weeds.
Enjoy.
On and on in the garden
 For those of you who are in Zone 5 and higher, my situation really does not fit. I’m sure you’ve been planting out in your gardens for weeks, if not the last month or so. And for those folks in Zone 7 or 8, you are coming to the end of your winter growing season, I’m sure!
But, for people like your dear Aunty, who grow in ‘Zone 4 which is really Zone 2’, things are still very chancy, even for cold weather crops. We had a couple of very warm days last weekend, which put the soil temperature way up, but I knew it would not last. Since we were slated to get rain (which we did, day after day after day), I uncovered the beds that I’d put under plastic so that they’d get a good drink and then I covered them back up again to get some solar gain.
Sometimes, people ask me whether putting plastic (or glass as I’ve done before) really is worth it. Well, this morning, after running errands, I went out and took the temperature of the end of the bed that didn’t get covered with the plastic. It was 44.3 degrees F. Too cold to plant anything in. Under the plastic, it was 50.1 degrees F. Marginally ready to put in seeds for plants such as lettuce, cabbage, cauliflower, broccoli, Chinese cabbage and so on. I’ll give it one more week. We’re supposed to have a couple of very sunny days in the low 60-degree range, which should bring that area under the plastic into a solid mid-50 degrees which will be plenty safe for sowing those seeds.
But I’d like you to notice the difference. Not under the plastic: 44.3 degrees F. Under the plastic: 50.1 degrees F. At this point in the spring, that’s a lot of temperature difference so I have to say it is definitely worth it since I’ll be able to put in those seeds now, in April, instead of late May otherwise. So, I’ve gained 6 weeks on my growing season. Definitely worth it.
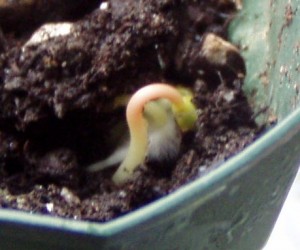
The photo at the top is of some buckwheat seeds I gave to my grandson to plant in a pot as a little activity this past week. He planted them on Tuesday. I put them into a plastic bag on top of a heating pad covered with an old towel in the green house. That photo was taken on Thursday.
48 hours, some dirt, some moisture and some heat and up they come. But wait until you see the next photo: This photo was taken on Saturday!!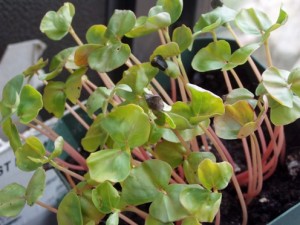 So, there you are – in terms of buckwheat, as long as you’ve got warmth in the soil and some moisture, they are up and running fast, which is the reputation of this plant, since the directions literally tell you that if you are not interested in growing buckwheat for seed (that is, to harvest seed for eating or saving), you need to be cutting it down and digging it into the soil in less than 6 weeks, when it will be flowering. This past week, when we had those sunny days, I sowed one whole bed under the plastic with buckwheat seeds to start the soil improvement process. That bed was created last year and we did not have proper compost to do it. We used compost from the county landfill which frankly was mostly rotted wood chips. It was awful and the tomato plants we put into it showed the lack of soil and lack of nutrients – they frankly crouched on the ground. It was a waste of time to put anything in there. I should have done then what I’m doing this spring – put in buckwheat and when it’s up, cut it down and dig it into the bed, then water well and sow more buckwheat seed. In a couple of months, I’ll have a lot better bed than I do now and I’ll be able to put something else in there in June and July, whether that is a crop of beans, or cabbage family plants for the fall.
Let’s see now. In our greenhouse (which is unheated – I use heating mats with grids over them for the seedlings to stay warm inside their huge clear plastic bags), the pepper and tomato seedlings have had to be moved to larger quarters, and I also sowed a flat of a mix of basil seeds I got from Pinetree Seeds Pinetree Garden Seeds. One of the things I especially like about this company (besides the fact that it is locally owned, not part of a conglomerate, and they offer an amazing array of vegetable seeds from all over the world) is that they offer mixes of things. I don’t have that large a garden, so buying three or four different packets of any particular thing is not cost effective for me. But we use basil in cooking a lot, so I grow a lot, and like different types for different reasons, so having a packet of a mix of basil is a great thing for me. They offer mixes of seeds for almost all of their veggies so, if you want to try something new, I recommend you take a look.
Another change this year is that our grandson is now at the age where we can start inculcating (woops – introducing him might be a better word) him about the wonders of gardening (hence the handful of buckwheat seeds in the pot of soil). I showed him a seed catalog and we went through it, identifying the various vegetables and talking about what he’d like to grow in ‘his’ garden – I figure one little 3-4 foot end of a bed will work for one tomato plant, one pepper plant, a marigold (got to have flowers in every garden, right?) and a handful of beans. I always feel that little kids get some of their best introductions to new veggies when they are in the garden and can pick, snip and pull them up by themselves. Who knows, perhaps he’ll learn to like kohlrabi and parsnips this year?
Garlic: Music wins again
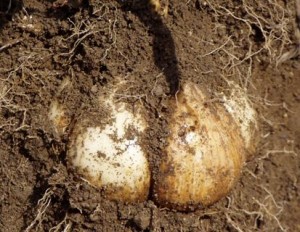 Last year, at just about this time, I dug up the garlic and we discussed how to pick which garlic and which cloves to save to plant in the fall for the next year. How to choose garlic for seed
And I remarked in that post about how fantastically the variety called ‘Music’ is. And you can get it here: Music
Music
Garlic varieties
Music
Not that I don’t think there are other great garlic varieties out there. What grows well for someone in Missouri might not grow well for us here. But I can tell you that after another horrific summer (and this time it was not wet, dry, hot, wet. We had a horrible dry winter), this variety came out like a champ. As a matter of fact, we had very little snow this winter, so even though the cloves had a bit of growth in the fall, (and we actually had plenty of rain in the fall), they were uncovered all winter long and then went into the spring with no moisture in the soil. The spring was dry too and then we went into June and July up here with practically no rain at all and super high temperatures – the hottest July on record.
So, the garlic was stressed in a major way. And I could certainly tell the difference when I compared the other garlic that I grew in the same bed. Same bed, same soil, same growing conditions, same amount of moisture. Music won again. Big juicy bulbs with huge cloves. Very impressive performance given the heat and drought stress. The photo at the top is a “Music” bulb that I partially uncovered to take a photo so that you can see just how big and robust it is. That bulb was about 3″ across at the bottom. I can’t recommend this variety enough.
Catching up
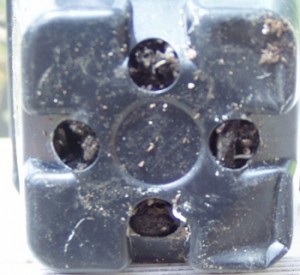 OK, Peoples! In our last episode Honey, I broke the tomato we discussed how to use ‘rooting hormone’ (in this case, the powder form) to try to save the broken-off tops of two tomato plants. That was (ordinarily I don’t bother with dates, but in this case, I think it’s illustrative) June 6th. Today is June 16th and see the photo above. That little white thing coming out of the bottom of that plastic pot is… a root. So, there you have it – 10 days from “broke” to “ready to go into the garden. (more…)
Honey, I broke the tomato
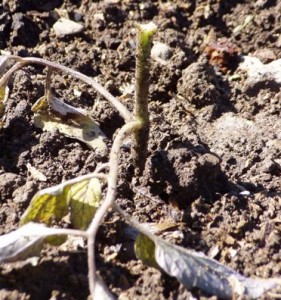 There are certain facts of gardening life that are right up there with ‘this won’t hurt a bit’ and ‘the check is in the mail.” You can absolutely count on the fact that if you have not gotten the plants into the garden at the optimal time, a massive weather system will choose to route itself through your backyard and right through the area where you have your tender little tomatoes and pepper plants and wreak havoc on them.
And snap a couple of them right off where they are just starting to branch off. If you are truly doomed, they will also have flowers on them.
So, what are you going to do with THAT? (more…)
Yes, we DO raise rocks here
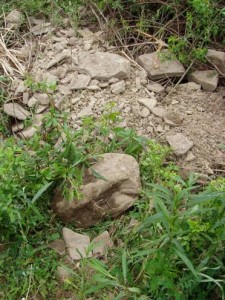 In our last episode, the DH and I (well, mostly the DH) were ripping up a grass strip that’s between two other vegetable garden beds to make another vegetable garden bed.New Garden bed the hard way And your Aunt Toby wanted you to know that we find all sorts of things that former owners have buried in the ground when we do this. We once found what was obviously the spot for the burn barrel (or whatever the former owner used to burn their garbage) and in our digging, we pulled out everything from pristine glass milk bottles to broken china to a leaf spring from a car. It’s really quite amazing. (more…)
Crystal Ball in the Garden
Well, as is my habit, I started taking soil temperatures in the beds in the garden yesterday and we’re in the 35-41 degrees F range. That means that we can think seriously about putting plastic or our oh-so-high-tech ‘left overs from the greenhouse’ big pieces of glass over the beds to warm things up even further. Once we get to 50 degrees in the soil, we can direct seed things like lettuces, spinach, anything from the cabbage family, chard, kale, and beets. Peas will come later and after that beans and squash, and plants for peppers, tomatoes, and eggplants. But for the moment, what is growing out there are the garlic and multiplier onions I put in in the fall (both they and the daffodils are now up). (more…)
