Kitchen Counter Economics Rotating Header Image

Uncategorized

How to get the most out of taking workshops

tabledone It’s not a secret to anyone, I think, that I love taking workshops. Learning new stuff is something that I dearly love to do. But over the years, I’ve come to realize that there are really several different sorts of workshops and of course people have all different sorts of reasons why they are taking them. Here are a few important things to remember when researching workshops to learn something specific. My most recent workshop was in woodworking but I think these are worthwhile when you are looking for any sort of workshop.

1. Be honest with yourself. (more…)

Oh, save me! Save me!

tomatoscoverd2So, here we are, chugging into prime tomato ripening season (a little behind here at Chez Siberia, but the total numbers of tomatoes are excellent) and the National Weather Service is predicting temperatures in the 40s.

Which means that at our house, depending on the wind, if any, fog…if any and so forth, it could actually be in the low 40s or even (shudder) the 30s.

Not that I’m concerned about a frost or a freeze. Not yet (even though everyone out there in weather land is predicting a Polar Vortex(tm) to hit in the last half of September). But even in the low 40s, that would shock the tomatoes. Perish the thought that we should ever have stressed tomatoes at Chez Siberia.

What to do…oh, what to do?

Well, as we have discussed several times before here, there is this stuff called ‘row cover’ which I positively dote on in terms of plant protection. Most people think of using this in the early spring as a piece of insurance, but with the heavier types, you can add up to 5 degrees of frost protection to plants, so even at this time of the year, if things are looking a bit dicey, this is something you can use, especially if you use the method we did this year, which was to put up woven wire fencing, reinforced with fence posts (we used metal ones that we used to use in the pasture, but your mileage may vary depending on how permanent an infrastructure you want to get involved in), with the tomatoes planted close to the fencing and tied up to the fencing as the plants took off.

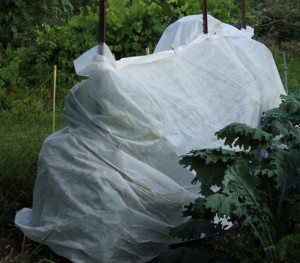
tomatoscoveredAs you can see, with this sort of arrangement, you can run the row cover on the long edge (it comes in various widths so frankly, as long as you don’t have a whole row of corn to protect or sunflowers, this will work) down the row, wrap it around one end and as long as your piece is long enough, you can take it down the other side of the fencing – in our case, we had tomato plants on both sides of the fencing. This is a huge improvement over trying to cover up tomato plants on stakes or cages. I’ve been debating with the DH over the benefits of growing the tomatoes like this and even he admits that there are no ‘cons’ in this arrangement other than what we’ll have to do at the end of the season in terms of cutting off the string, taking down the plants and ripping them up and moving the fencing and fence posts (we will be moving the entire affair down to the other end of the garden to the last bed before the rhubarb as a rotation.

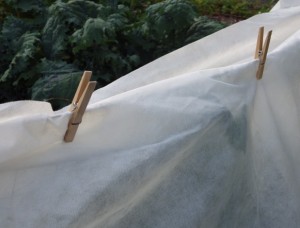
tomatoscovered3So, we ran the row cover around both sides of the row of tomato plants. So far, so good. But you do want to seal it up, somehow. Check this out – laundry (pegs) clothespins over the row cover, folded over the fencing and neatening up the ends of the row cover so that not a speck of chilly air can hit those green tomatoes overnight Tomorrow morning, depending on the temperature, we’ll just unclip the pegs, pull off the row cover and let the tomatoes soak up as much sunlight and warmth as they can.

Why thank you; I knew you’d like the idea, too.
Bon appetit!!

Please note: I would not use plastic or old sheets to do this – we find plastic lays right on top of the plants and can stick with a frost, so we don’t use plastic. If you don’t have row cover – the best place to get it (and they ship super-fast) is Gardener Supply

OK, so you’ve got a garden – what are you going to do with it?

tomatopasta1OK, so here we are, at what, for us here at Chez Siberia, is well on the way to the prime production time out there in the garden. And frankly, even though we’ve been doing this for (ahem) 35 years, we, too get the shakes when we look out there (and our garden is not that big, truly, folks) and see all that stuff that has somehow been produced through seeds, sun, and water.

It’s humbling, truly. (more…)

Pickling time

Now, I would not necessarily say that you can make pickles out of anything, but considering the fact that you can make pickles out of watermelon rind and zucchini, I think it’s not a real stretch to say so. At this point in the gardening season, the veggies out there are pumping out amazing amounts of stuff and there is no way for us to keep up with eating it fresh, so here at Chez Siberia, we tend to freeze and can (or, more technically speaking, jar) things when they are at their best. Today’s been busy – the DH and I have already done up zucchini bread and butter pickles
zucchini pickles
and were left with a dutch oven full of the pickling liquid.

The DH, not one to allow good pickling liquid to go wanting a use, ran out to the garden, and came back thirty minutes later with a huge bag of green beans with the suggestion that we pickle those too.

oooookay. Far be it from me to argue about this because although I LOVE fresh green beans from the garden, we have never had good luck with freezing them (I think they have the texture and taste of paper towels, frankly) and I think I have at least a dozen big jars of beans that we canned a very long time ago (and they are fine – the seals are intact, no bulges, leaking, etc. No discoloration and the cloves of garlic in the jars look perfect) which sit, lonely, in the dark of the pickle cellar downstairs. So, it’s obvious to ME that no one is going crazy for canned green beans.

But green bean pickles? Hmmmmm, that might be a winner and I’m certainly willing to try.

This is as much of an experiment as anything else but here is what we did and we’ll see how they come out.

For a big bowl of beans, washed, tops and tails trimmed and sliced on the diagonal (because I dote on diagonals):
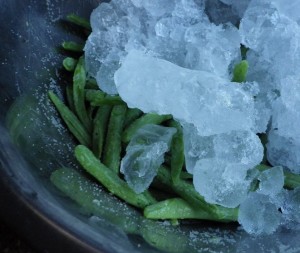
Sprinkle 1/2 cup of canning or coarse salt and mix thoroughly, cover with ice and cover the bowl and allow to sit for three hours. Then rinse thoroughly three times.

Meanwhile, wash several canning jars and put into an oven preheated to 200 degrees F until hot. Put matching sized lids and rings into water in a saucepan and heat until simmering. Turn the heat off.

Put into a big pot (like, dutch oven sized):
3 cups of white vinegar
3 cups of white sugar
2 tsp. celery seed
2 tsp. mustard seed
1 1/2 tsp. turmeric
1 tsp. dried ground ginger
1/2 tsp. ground black pepper

Once you’ve rinsed the beans, bring the pickling liquid to a boil, throw in the beans and reduce heat. When it comes back to a simmer, keep it at a simmer for 2 minutes. While it’s simmering, get your funnel, spoon etc. ready.

Ladle the beans into the hot jars to within 1/4 inch of the top edge. Clean off the edge with a clean, wet paper towel, and then put on a lid and band and tighten down. Process the way you do all other pickles (water bath for 5 min. or whatever is your favorite method).

We’ll report back on how these turn out.
Bon appetit!!

Cue the scary music

I am sure a lot of readers here have seen a photo that is out there on the ‘net’ showing a huge boulder with a tree growing right up through the center of it as an illustration of ‘paper beats rock’ or something like that.

But in the garden (or at least the gardens that most of us have), we are not dealing with a tree growing up through a rock. We are dealing with vegetables that, pound for pound are probably stronger than we are. I point out the photo at the top. That, my friends, is a tendril from a vine of (deh-duh) a spaghetti squash. I love spaghetti squash; I truly do. But the vines all by themselves are aggressive and voracious, running all over the place in a garden, climbing out, hitting the streets. so far, the only way we’ve been able to keep them under control is with a lawn mower.

Truly.

This year, because we put out electro-net fencing to keep out the bunnies (and we’ll see how well this works; I’m thinking the openings are too big for bunnies. They might work with a rather rotund woodchuck, but I’m thinking a bunny is going to have no issues with it, frankly), the spaghetti squash vines have made a break for it by attaching themselves to the electro-netting. And wrapping themselves around it with those tendrils. Look closely; those thing don’t just snag on the netting; they are wrapped around in corkscrew fashion. A few more of those and I anticipate seeing that fencing laying flat on the ground and waving a white flag. (more…)

Make dessert a dessert: Chocolate Banana Cream Pie

There are times when right down to the tops of your sneakers, what you want is a dessert that has basically no redeeming qualities whatsoever. I don’t know that anyone can be blamed for that. This is something that frankly, if you know in the morning that you are going to have informal guests that night AND you have the ingredients at hand, you’ve got a great dessert. But be warned: it needs at least 3 hours of time in the fridge to set up properly.

Here is what you will need, besides a pie plate and two ripe bananas (but not mushy – you should be able to smell the banana scent but they will not have reached the ‘OMG – these are only good for banana bread’ stage).
Some sort of pie crust – enough for the bottom of a 9-10″ pie pan. It doesn’t matter if it’s a refrigerated one, graham cracker, something you make yourself or whatever. If it needs baking, bake according to a ‘not filled’ pie for that type of crust and let cool completely.

White Layer: Beat together the following
1, 8 ounce package of some sort of cream cheese – this works equally well with regular ‘high test’ cream cheese, the reduced-fat stuff, the non-dairy tofu-based stuff.
1 tsp. of some sort of flavoring (I used almond for this but vanilla or banana will do – you can even go ‘high society’ and use some sort of fruit-based liquor)
1 cup of confectioner’s sugar

Set that aside – you can put that in the fridge and it won’t harden up.

Chocolate Layer: Stir together in a heavy-bottomed sauce pan
2 packages (the small ones) of ‘cook and serve’ pudding mix. I used dark chocolate, but literally any sort of ‘cook and serve’ pudding will work for this.
1 1/2 cups of milk (again, any sort of milk will do – I’ve even done this with almond milk)
Bring this slowly to a boil, over medium heat, stirring constantly. I use a whisk but a big metal spoon will work also. Once this comes to a boil (and it will have thickened up considerably already), keep stirring until it gets very very thick and you can really feel the resistance against the spoon (that should be about 5 min. but no more – you don’t want this to burn on the bottom of the pan). Take off the heat and set this aside to cool off. You want this to be basically room temperature when you pour it into the shell.

Once everything is cooled, take your cream cheese layer and pour that into the bottom of the pie crust. Then slice the bananas and lay them out, as you see here in the photo, starting at the edge and working your way into the center until the entire surface is covered in sliced bananas. If you want, you can sprinkle cinnamon on top of the bananas and this really perks up the flavor tremendously.

Then, take your chocolate layer and pour that on top. You can also add other dainties on top, such as chocolate mini-chips or toasted coconut. The pudding will support them. The pie will look something like this photo. At this point, put the pie into the coldest part of your fridge and leave it for at least three hours before serving.

Prepare for people to get rude and lick the plates.

Additional notes:
Here’s a great GF crust for this: 2 cups of almond flour, 2 Tablespoons of butter or solid coconut oil, 1/4 cup of cocoa, and one egg. This will have the qualities almost like a wet graham cracker crust. Press this into the pie plate and bake at 350 for 12-15 min. and cool.

Please note: You can also make this into a frozen pie. Here is a photograph of what this pie looks like once it’s frozen. As you can see, the texture is completely different, at least in the chocolate layer. The white layer does not freeze hard – so it’s more ice cream in texture while the chocolate part has definite crystals. I think it changes the dessert into something completely different and actually quite delightful – reminds me of ‘fudgesickles’ (if you are old enough to remember those) in a pie crust, actually.

More good for you beans!

Yes, I know it’s summer and the grills are just hopping out there. Who wants to read about more bean dishes, right?

Well, you can’t eat meat all the time. A couple of vegetarian meals a week is not going to hurt anyone and these garbanzo bean burgers (say that three times fast) are tasty, filled with protein and fiber. You can definitely give yourself the old ‘oh, what a good boy am I’ when you eat them. I served these without any sort of bread, but you can treat them like a burger and serve on a whole-grain bun as well, with condiments, cheese, tomato and whatnot.

Here’s a rundown on garbanzo beans for a one-cup serving:
Protein: 14.5 grams
Folate: A serving has 71% of all the folate you need in a day.
Dietary fiber: 12.5 grams – that’s 50% of what you need in terms of dietary fiber in a day.
Vitamins and Minerals – all sorts, but they are the champs in Manganese.
Glycemic Index: 17
For more detail, go here: Nutritional data on Garbanzo Beans

So, how do you make garbanzo bean burgers? Well, the first thing to remember about working with any bean product to make patties is that the beans by themselves are really rather bland. That is actually good because you can, through the use of other veggies like onions and various spices, zip up the taste.

Here is how I made these burgers:
One can of garbanzos, rinsed well and mushed up a bit (don’t mush them completely because then the burgers don’t have any texture to them. Leave some beans whole or just a little bit mushed).
One small onions, finely chopped
1 Tbsp, dried dill weed
2 large eggs
1/8 cup of olive oil
1/2 tsp. of powdered garam marsala
1/8 tsp. of smoked paprika
1 cup of seasoned bread crumbs

Mix all of this together and form patties – it should make four, good-sized patties.

Then, mix together the yoghurt sauce (if you are going on the Mexican side with your spices, perhaps you’d rather use salsa for this):
1 cup of Greek yoghurt
1 green onion, finely chopped
1 tblsp. finely chopped cilantro

Mix all together and put in a bowl in the fridge and ‘marry’ up the flavors.

While you are waiting, you can cook the patties.
Using a non-stick fry pan, put in a tablespoon of olive oil and put it on medium heat until the oil thins out and runs over the bottom of the pan. Carefully put the patties in and cook, on medium heat for 4-5 min. Keep an eye on them to make sure they do not scorch too much.

Flip with a non-stick spatula and cook the other side for 4 min. until all warmed through.

Serve with the yoghurt sauce and a big salad.
FIBER CITY!!!

Garden update: early harvests

Well, here we are in the early stages of our garden here at Chez Siberia. We’re now long past the early ‘spindly’ stages of things; now the garden is really shaping up. We’ve got a couple of odd empty spots where certain seeds did not come up or the rabbits have chewed things down. We have fencing up now so that should not be so much of an issue (though part of it is that the plants themselves are old enough now that they don’t taste so yummy to the rabbits and they’ve moved on to other, younger things outside the fencing).
(more…)

Thoughts on a Sunday night

Summertime is very busy for everyone, but here are a few thoughts.
1. This is a sawhorse. One of the things on my ‘to do’ list (which is becoming more urgent as time goes on, as I get older) is getting more involved in woodworking. On an odd chance, I searched on ‘wood working classes’ in my area and found a terrific place which frankly caters to women. Hammerstone School of Carpentry for Women They have lots of courses, but the basic carpentry one attracted me the most. I can tell you that after two full days of swinging hammers and using everything from power saws to hand saws in the company of women just like me (well, not JUST like me; I was the granny of us all), (more…)

Catching up: the garden

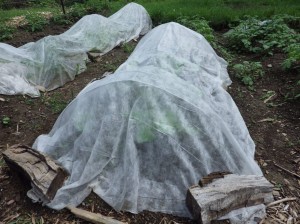
This is not a very exciting photo but it does give a pretty good indication of what, to the casual observer, is our garden this year. We got started late, got invaded by rabbits, got very little rain in late May and early June. So, to thwart the rabbits, at least until things like corn and the sunflowers are big enough to be able to withstand nibbling, I covered everything up with row cover. Row covers come in all sorts of weights, from ‘blankets’ which you can use early in the spring and late in the fall to withstand several degrees of frost to stuff that is basically see-through and which you use to thwart insects. What I’m using is sort of a midrange item; it does cut back on how much sunlight can come through but on the other hand, the rabbits can’t see through it to get any nasty ideas. (more…)

Blog Widget by LinkWithin

Bad Behavior has blocked 331 access attempts in the last 7 days.