
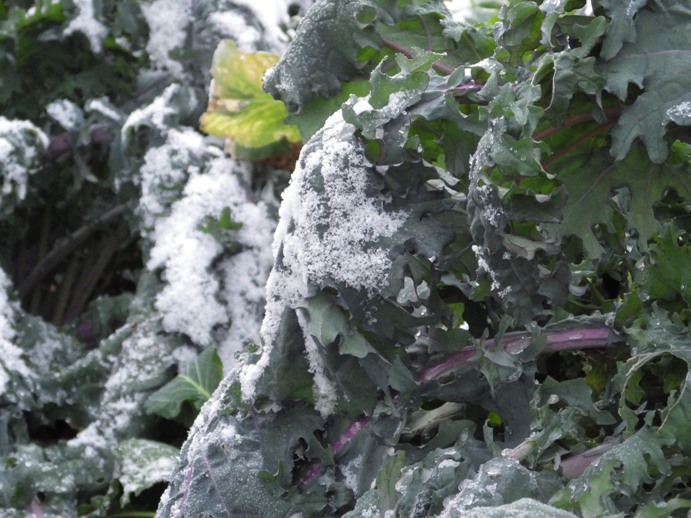
 And a good, good day to everyone, wherever you are. This has been a very busy week in the garden for the DH and your Aunty. Not for choice necessarily, but sometimes you have to get things done before the weather gets colder, or rainier or something else (yes, what is on that kale is SNOW – it was 27 degrees F this morning. I think we can safely say that winter is coming).
The big job that had to be taken care of was the arrival of the replacement fruit trees. Yes. Replacement. Not addition. Replacement, as in ‘Dear Sir, the fruit trees x.y.z etc. that I ordered from you did not grow. As a matter of fact, they died. Toes up. Kicked the bucket. Gone to meet their maker. Please send replacements. Respectfully…” It happens, and if you don’t know this first thing in the spring (which most people don’t because you are waiting, hopefully, that the damned things will leaf out and oh, joy!!
Only these ones did not.
The weenie whiners in the group were basically peaches and nectarines (which are a tad less hardy than things like apples and pears), ditto for the sweet cherries. All the apples came through like champs though and the pie cherries. So, the lovely folks at Starks Nurseries (what would be considered our ‘local’ nursery, Millers, sold out to them last year, boo hiss) sent us a bundle of trees – and they always come late in the fall. I’m not sure why, exactly; I’d think that something like early October would give you a better shot but what the heck.
So, these arrived on Thursday, which was cold, rainy and thoroughly unpleasant but the DH and I looked one another in the eye, put on the rubber boots and other rain gear and did our yeomanlike best to get these trees into the ground before things got worse. Which, of course, they did on Friday. And then it got cold and snowed a bit and here we are today. So, pats on the back all around for manning and woman-ing it up to get them into the ground.
 The other thing about planting fruit trees, before your old Aunty gets off on another digression is this: One of the things you really (really!) need to do, even if you think you have no wildlife around, is to put what some people refer to as a ‘deer guard’ on the tree. Now I think calling it a ‘deer guard’ is sort of a misnomer because in order to protect a tree from deer, you need something that is about 6 feet tall (and preferably comes with spot lights and a guard tower), because deer will chew the ends of the tender shoots like crazy. In the winter time, it’s basically the only thing they’ve got to eat and frankly, they have all sorts of lovely vitamins and minerals which, as ruminants, deer can make use of to get them through until spring. So, if you can’t stop that, why put one on? Well it’s really to protect the tree (and you need to leave it on, like..forever) against animals like rabbits and voles and mice, which will chew any bark they can reach. In the case of voles and mice, they will even burrow down a couple of inches to get at it and if they girdle the tree, well then, there goes any hope of apples or pears or anything else because that will kill the tree. In the case of rabbits, we’ve even seen then in the winter, stand on their hind legs, on tippytoe, to reach low-hanging branches and they will just chew the heck out of them. And if you have any amount of snow at all and have a firm crust, that means that the rabbit can actually reach up pretty high on the tree while standing up like that.
So, here is how you make a deer (or rabbit) guard (see the photo above). You’ll need the following:
1. Roll of hardware cloth. You need fencing that is a) sturdy and b) with small holes. Don’t try to use chicken wire or other sorts of fencing because the mice and voles will get through.
2) Zip ties (the short ones work really well)
3) Wire cutters
4) Measuring tape or yard stick
5) work gloves (because cutting the hardware cloth is tough stuff and leaves all sorts of nasty pokey ends to stick you. And safety glasses or goggles.
6) Something heavy like a cement block or a bunch of heavy books or something because a roll of hardware cloth has ‘memory’ and will want to roll right back which makes it hell to measure out and cut.
OK, so undo your roll of hardware cloth and weigh down the free end.
Lay out your tape measure or yard stick and measure a length of hardware cloth that is 36″ (or a meter for our metric friends around the world; your circle will end up being a tad larger).
Using the wire cutters, cut up the width of the hardware cloth. Be careful to keep hold of the free end because again, this stuff has been in a roll for goodness knows how long and it wants to snap back, which is why we say, goggles and gloves.
Cut as many 36″ long pieces as you have trees to do – in my roll, I was able to get about 8 out of it.
Stand your piece on one edge and with your zip ties, overlap the cut edges about an inch and use a zip tie to secure the overlap at the top and bottom and then do one in the middle. That will be enough to keep the hardware cloth tube from coming undone.
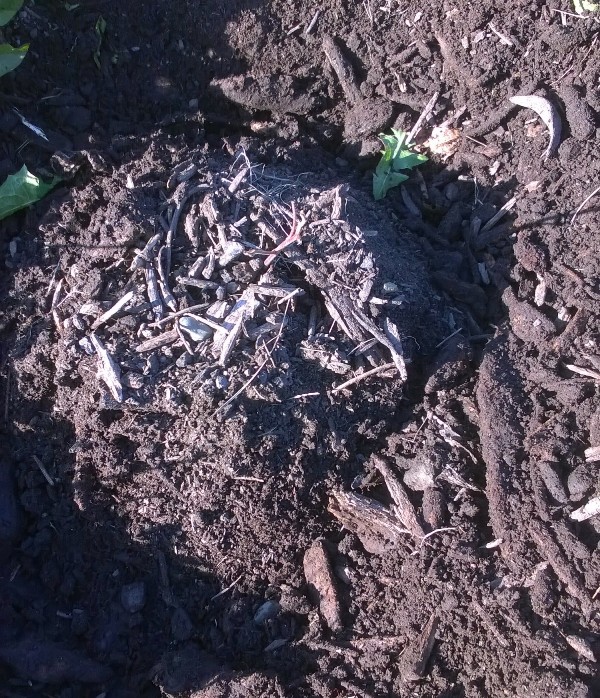 How to install: The point of this is not just to put it over the tree and la-dee-dah, you are done because this does nothing against the mice and voles. So what you need to do is dig down several inches (see the trench in the photo above) that is the size of the bottom ring of your guard. The easiest thing to do to make sure that it’s the right size is to put the guard over the tree and press it down into the dirt around the tree and turn it back and forth to make the circle. Once you have your trench dug, then put the guard back over the tree in the trench. Then pull the dirt and mulch back around the OUTSIDE of the guard, right up to the guard. Then press it down firmly AGAINST the outside of the guard and the ground. Now you are done. Something we also do here is to create metal ‘staples’ (just U-shaped pieces really) out of wire coat hangers. Using your wire cutters, cut 9-10″ pieces out of wire coat hangers, shape into a “U” and then put two over them on either side of the edge of the guard, pressing the ends into the ground to hold the guard in the ground.
So, what else did we do? Well, we received our order of garlic bulbs to plant and we did that this morning after things had warmed up a bit(I don’t fancy kneeling and poking my hands into wet freezing dirt; I have a thing about that). Planting garlic is simplicity itself.
1) Take your garlic bulb and divide it all up into individual cloves. If you have one really teeny ones in the bulb, just use those for cooking; they usually don’t come to much in the garden.
2) Dig up your soil so that it is soft enough to plant something into.
3) Stick your hand in the soil as far as you can get it 4-6″ deep is deep enough. Take a clove and put the blunt end (not the pointy end), the end where there are little teeny bumps into the soil and cover it up. Move your hand about 4-6″ away and dig down and plant another one and keep doing that until you’ve used up all your garlic. It might start to send up leaves (depending on how warm it is when you plant them; we always wait until we’ve had at least one good frost) but don’t worry about that. They will sprout and come up nice and early in the spring. Let them go over the spring and summer. Make sure that they get watered well once a week, otherwise, they won’t make big bulbs. When the foliage dies down, then they are finished. Dig them up. Let them dry in the sun. Pick the biggest/heaviest bulbs to save for ‘seed’ and plant those next fall. Great stuff.
 One last item — As you can see, there are some veggies which can really take a good hard frost (and we’ve had quite a few since early October. Most of these, frankly, are out of the cabbage family. We have both kale and Chinese cabbage (more like pac choi, really) which look great and frankly taste even better now that they’ve been frozen a couple of times. I think it increases the sugars. We’ll keep eating these as long as they remain nice (as long as the deer don’t get to them, which by January they usually do and by that time, they are pretty raggy anyway so they are welcome to them), which is a great thing to extend the fresh veggie season. If you like the idea of that, you might like to check with various seed sellers over the internet to see what they have in terms of winter hardy veggies and get seeds to get started early in the spring in 2015 (already???? Yes, get ready NOW).
Stay warm. Eat something green!


