
 I’m sorry it took me so long to get back to this but several readers have reminded me that I owe everyone the completion on this. So, back to basics.
1) You’ve got lining, scissors, pins, a measuring tape and something long with a straight edge – yard stick, that sort of thing.
2) You’ve measured the length of the coat and the width of the coat. Lay the coat down on the floor or a big table. (more…)
sewing
Relining a coat – Part 3
Oh…Darn
 So, here I am, all full of myself because I have this brand new coat that I made ‘awwww by myself’ (don’t wanna be…all by…). A dog with two tails and all that.
And we’re in a rush to leave and I run out the door and twist around because I realize I have not done the little locking button thingy. And I turn around to shut the door and…. (more…)
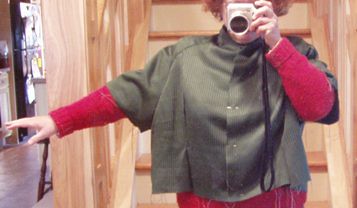
Ladies and Gentlemen – I think we have a coat.
 Like all great projects, when it’s done, there’s a little bit of a feeling of let down. So, let’s go through the details to review: (more…)
Making a Coat: Details Are What Make It
First, a bit of housekeeping detail. Because I wanted this coat to be as long as I could get it (no red chapped knees for me), I made the decision that I was NOT going to fold up the hem. The other thing is that the fabric is so spongy that I was afraid the hem would end up looking lumpy. Using the same poly shantung fabric that I used for the welted pocket in the lining and the bound buttonholes, I made 3″ wide strips of bias. I ironed down 1/2″ along one long edge and sewed it all along the bottom edge of the coat. I now have to steam press it and catch stitch it into the interlining. When I’ve done THAT, I’ll put in the lining. I know there are a lot of folks out there who are vastly more experienced than I am and who are vastly better sewists than I am..and who use something referred to as ‘the bagging method’. I, on the other hand, because I am stubborn and wedding to things that I learned at Mrs. Reynolds’ knee in high school, have sewed up my lining completely and will be pinning it in and sewing that baby in, invisibly, by hand. Part of this is because this coat weighs a ton (more…)
Building More Utility Into A Coat With The Lining
 There’s a certain point in making a coat where you can switch gears and work on something else with the garment, an entirely separate part of the project. That is the lining. And I think in general, sewists view making the lining in a sort of ‘ho-hum, let’s get this over with, after thought’ sort of way.
Which Aunt Toby feels is a real mistake. This is the same sort of thinking that manufacturers use when they make linings out of the sleaziest, cheapest junk that splits at the seams, frays out and cheapens the product immensely. Linings perform several functions, most of them very important and so making a lining for anything deserves some real thought and attention. (more…)
Get Back..Get Back..Get Back to Where You Once Belonged…
 Sometimes, when Aunt Toby is considering a new sewing project, it really behooves me to actually think out the issues of ‘what am I trying to do here” and “what’s the end result” before I buy fabric. I realize most of us who sew have advanced cases of ‘stashaholism’ and could lay our mitts on at least one piece of fabric to make something at any given moment. One of the problems with buying fabric off the internet (more…)
Do NOT Fear the Coat
 For a lot of home sewers, making a coat takes on this aspect of climbing Mt. Everest: Too big, too hard, can’t possibly do this. Fear of ‘the coat’ is a very big deal.
Part of it is the price of the materials. I won’t be delusional about it. Good coating costs real money – and it’s not something you can find at your local ‘national craft store masquerading as a fabric store’ chain place. A lot of people who sew love beautiful fabric but don’t want to cut into it for fear of making a mistake. That’s why making a muslin is so important – if the muslin fits, then the item you make in the ‘real stuff’ will fit too. That is what it is for – to work out all the bugs before you cut into the coat fabric. (more…)
Muslin Warfare
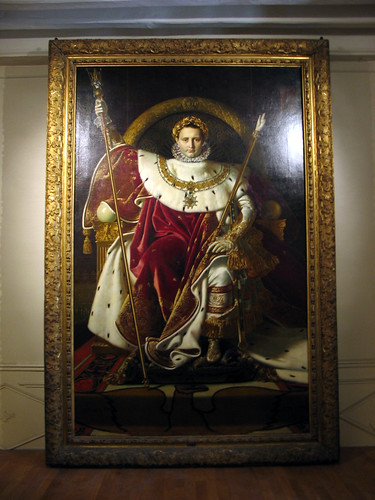 Victory belongs to the most persevering.
Napoleon Bonaparte
The Little Corporal may never have picked up a pair of scissors and a needle in his career (actually, I’ll bet he did – everyone knew how to sew a seam and darn a sock in those days), but he did know about always moving forward.
And moving forward I needed to do because a) it’s getting colder all the time (isn’t that a Beatles song?) and b) that brown basketweave wool was just sitting there, glaring at me, filling me with despair. I had a new pattern, the Vogue 8626 and had been clutched by ‘fear of doing another muslin’. What if it didn’t work? What if this one looked as bad as the last one? What if it looked (gasp) worse? (more…)
When I’m Wrong – I’m Wrong All The Way
Dayam. One of the truly frustrating parts of home sewing is that sometimes you can go through all of this:
Pit stop on the muslin
First Fix
Armscye
Choosing the right pattern
and still feel like this:
Sheesh. One of the only advantages to retail is that you go to the store and either they have what you want..or they don’t. And if they have it, it fits..or it doesn’t. You don’t have to go through all of this agony. But if you need a coat (which your Aunt Toby desperately does) and you can’t find one you like or you can’t find one that fits (ditto, ditto), then agony it is. (more…)
Making Home Sewing Pay: Pit Stop on the Muslin
 So, what can we do about this armscye issue? Well, I’m no good at redrafting patterns. I admit that and hope someday to ameliorate that situation. But I’ve used a particular technique several times and it does work. As you can see, the underarm seam is just too low. But how low IS it? I need to find out where my armpit actually is in comparison to the sleeve seams here on both the front and the back. (more…)
