Sometimes, my eyes are definitely bigger than my ambitions. I wanted to make my son a coat that would be nicer than what he wears for work and he pointed out a coat in this bookMen’s Coat Book that he wanted.
A pea coat. But I wanted to make it a bit more stylish than that (yes, Aunt Toby realizes that the pea coat is a men’s style icon but if I’m only going to get one shot at making my son a coat that he can wear for everything from a concert to a trip to a restaurant, then I want to make it a bit more fashion forward than a pea coat), so I looked through all my Burda pattern magazines and found a man’s jacket with what we’d refer to as ‘princess seams’ (if it’s a man’s garment, do we get to call them ‘prince’ seams?). My son is a bit more narrow in the shoulders than he is in the hips, so having extra seams would give me more fitting spots for him. So, being not the ‘forward thinking person’ that I should be, I just frankenpattern’ed the two of them together, making a new pattern.
And then, got stuck. How to put the pockets in AND get the welt flaps on in the right places as well? Pockets are one of those things that, despite almost 50 years of sewing, I have to think through in a very focused, conscious way. Even patch pockets require my rehearsing because for some reason, if I don’t, I end up with a horrible result.
In this case, since even the diagrams in the Japanese men’s coat book did not help (because they were doing a welt pocket insertion — something that requires me to lay down with a toddy in a dark room with a cool cloth on my forehead BEFORE I even start to think about it), I needed a quick and easy way to figure out what was going to go where, and in what order it needed to be done.
 So, I went with paper dolls. This is a technique that I remember from my sewing class in high school (whispering here – 40 years ago), where to illustrate how patterns went together, we were given sheets of drawings of pattern pieces and had to cut them out and put them together without instructions as a way of teaching ourselves how to sew clothing if we did not have instructions. Now the pieces of patterns we worked with were much larger – my memory of that exercise was that we ended up with something that would have fit a doll about the size of a baby doll – but I figured this would work. The only problem per se, was in the front. I now had a ‘prince’ seam, pockets to get in the seam, and a flap that after the ‘prince’ seam is sewn from the shoulder down to the hem, that will be in the right place, vis a vis the pockets that are now on the inside of the coat.
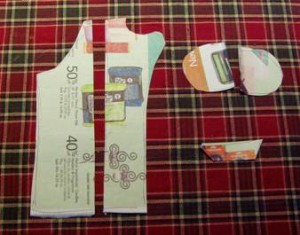
Paper Doll Number 1: Here are the pertinent pattern pieces: Center front, left front, pockets, and the flap.
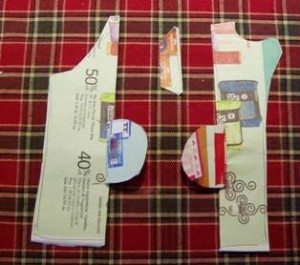
 Paper Doll Number 2: Well, I’ve now got figured out that I have to pin the pockets right side to right side, edges matching so that when I flip them inside, the seam is encased inside the coat. But what about the flap? On top of the pocket? Between the pocket and the center front of the coat?
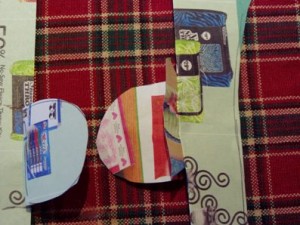
 Paper Doll Number 3: Ah Ha! Got it. In order for the flap to end up in the right position in terms of the pocket and the center front piece of the coat, I have to put it between the pocket and the center front coat piece so that once I’ve sewn then down and flipped the pocket inside (to be sewn together with the other pocket piece, now sewn to the left front of the coat and flipped inside), the flap will flip to the left so that once I’ve sewn the “prince” seam, the flap will be in position for me to sew the top and bottom part of the flap to the left front of the coat, leaving the opening available for a hand to go in, and find the pocket.
Success!
