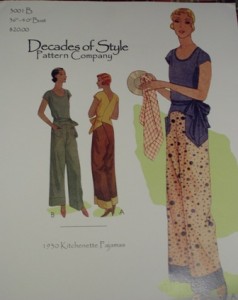
 Ahem. As we discussed the last time, Aunt Toby is making what is really a rather fancified housedress cum jumpsuit with the pattern (originally from 1930) shown at the top. And I ran out of fabric for the whole thing, so the front bodice is made out of rather Schiaparelli-esque pink poly lining (hey, I go with what I’ve got in the stash, ya know?). And today’s rather short report is on the front.
Now, because I’ve made the front bodice out of a lighter colored fabric (lucky you), you can see a lot better the fiddly bits in the front – reference the bicolored-version of the jumpsuit on the right hand side of the photo. Now, I’m not sure exactly why the front was designed in this way with these two rather startlingly shaped tabs hanging down and intersecting the leg portions of the jumpsuit, but they do.
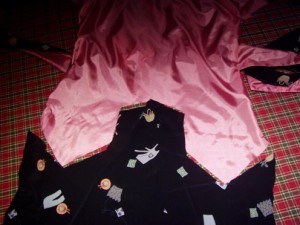 As you can see from this photo (and a poorly lit photo it is; my apologies), these tabs literally go down about as far as the center front crotch seam does. If you have enough fabric to make the jumpsuit all one fabric, you just might miss the seaming, especially if you are using a print. Someone using a one-color fabric might want to emphasize the seaming with piping or contrast stitching, but I figured shocking pink against the navy blue would be startling enough. The way you put this together is this:
1) Sew the front center crotch seam.
2) Sew the back center crotch seam.
3) Put the front and back together and sew the side seams and the inner leg seams.
4) Match the center crotch seam at the top edge with the center of the front bodice piece (you did mark the center, right?). Also match all the markings, the corners and any other oddly shaped thing that is sticking out or is cut into the pattern pieces (and as you can see, there are a bunch of them but trust me, all those ‘outie’ and ‘innie’ corners do match.
5) Match the side seams on the upper bodice piece and the leg side seams.
6) Match all the other markings on the back pants pieces and the back of the bodice.
7) Start at one edge (I don’t think it matters really) and sew alllll the way around, being a mite careful at all those inner and outer corners on the tabs on the front bodice/leg meet ups. Carefully clip into the corner bits.
Press. If you want to stitch again, do so now.
Hang it up, and repeat these words, “Oh, what a good sewer I am!”
Next time: Finishing up! (Don’t forget the Rudy Vally records)
UPDATE: Number 7 above: Start at one edge and go all the way around? Well, that worked when I made the muslin out of cotton seersucker. When I tried it with this rayon poly ‘whatever it is”, it made the top layer scoot ahead and I ended up with a mess. So, I took (sigh. Frog time again) it all out and started from the center and went in one direction to the center back edge and then went back to the center and went the other way. No problems this time. See photo: 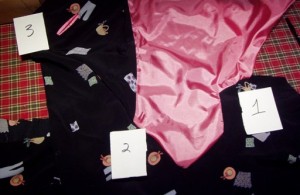 See number 1? That the center seam on the pants legs and the center of the bodice front. Number two is the side seam for both the bodice and the pants, and number 3 is the center back of the right back bodice. And that’s the order I sewed in, also. Then I went back to number 1 and did the other side. Worked beautifully and I did not have any pucker or other issues.
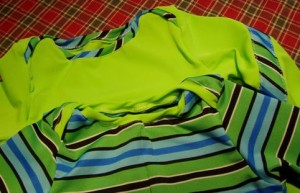 It’s summer where we are (if you are in the Southern Hemisphere, dear reader, you know you are not but you might find this useful in any case), and trips to the lake, beach, and swimming pool are on a lot of people’s lists. Your Aunty is of an age when she remembers people slathering on iodine and baby oil, grilling themselves on the beach for hours at a time, and no one thinking anything about it. A lot of those people now look like the pair of ancient shoes and have had to have surgery for skin cancer but that is a discussion for another time.